Storing your kayak the right way is just as important as choosing the kayak itself. A poorly stored kayak can easily get damaged, warped, or worn out by the weather. That’s where wooden kayak racks come in. Known for their strength, natural style, and long-lasting reliability, these racks are a favorite for paddlers who want both function and beauty. In this guide, we’ll explore why wooden racks are a smart choice, their types, benefits, and even how to build one yourself.
Why Proper Kayak Storage Matters
Proper storage is essential to keep your kayak in good condition and ensure it lasts for many years. Kayaks are exposed to sun, rain, and varying temperatures, which can cause warping, cracking, or fading if not stored correctly. A good storage solution protects your kayak from physical damage, such as scratches or dents from falling objects. It also makes your kayak easier to access and keeps your space organized. Whether you store it indoors, in a garage, or outdoors by a dock, a reliable rack prevents unnecessary wear and keeps your kayak ready for your next adventure.
The Appeal of Wooden Kayak Racks
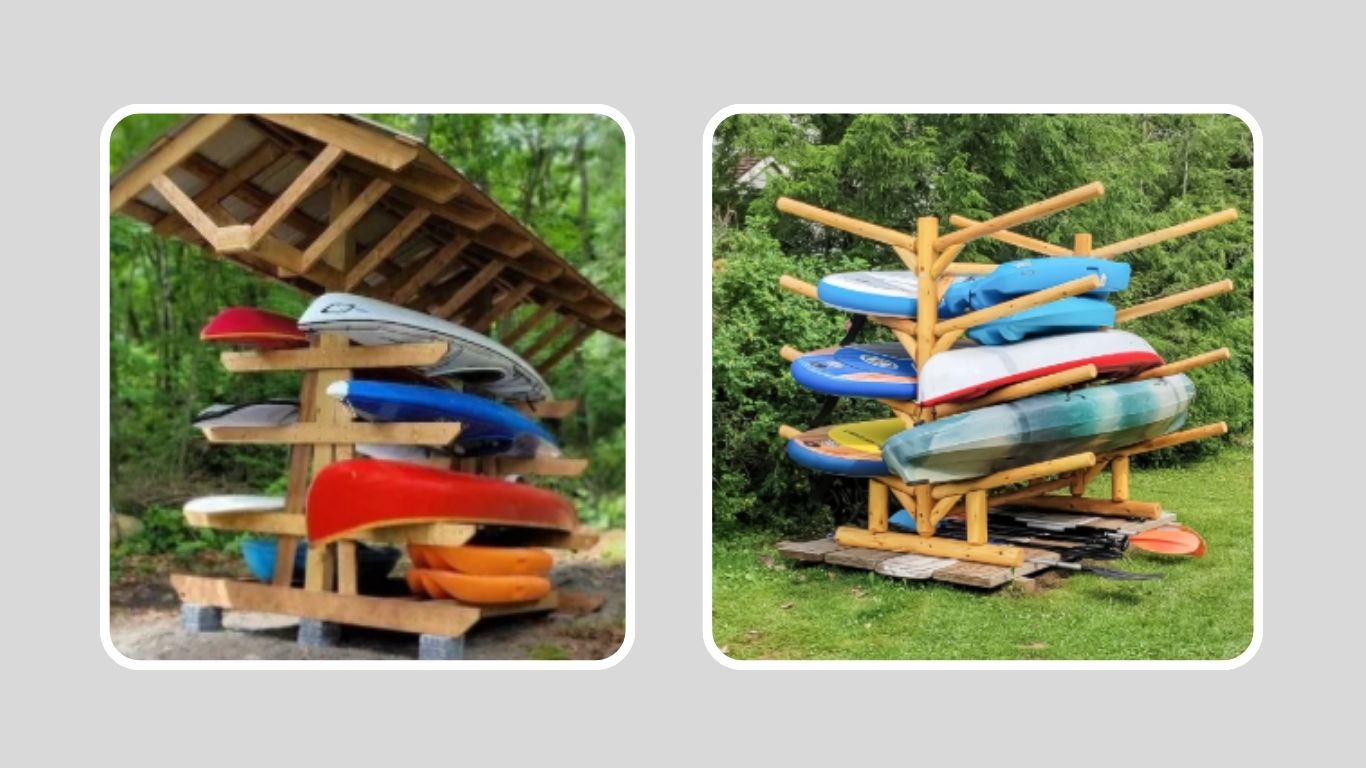
Wooden kayak racks are more than just functional; they add a touch of natural beauty to your storage space. Wood is strong and durable, capable of supporting the weight of one or multiple kayaks without bending or breaking. Unlike metal or plastic racks, wooden racks offer a warm, rustic look that blends well with outdoor environments like docks, backyards, or garden areas. They are also eco-friendly and can be customized in size, shape, and finish, giving paddlers a stylish yet practical way to protect their kayaks for years to come.
Types of Wooden Kayak Racks
Wooden kayak racks come in several designs, each suited for different storage needs and spaces.
- Freestanding Racks: These racks stand on the ground and are ideal for backyards or docks. They can hold one or multiple kayaks and are easy to move if needed.
- Wall-Mounted Racks: Perfect for garages or sheds, wall-mounted racks save floor space while keeping kayaks secure and accessible.
- Ceiling-Mounted Racks: Ideal for indoor storage, these racks lift kayaks off the floor, protecting them from damage and freeing up space.
- Dock-Mounted Racks: Designed specifically for waterfront properties, these racks make launching and storing kayaks convenient and safe.
Each type has its own benefits, so choosing the right one depends on your available space, storage needs, and personal preference.
Best Wood Types for Kayak Racks
Choosing the right wood is key to building a durable and long-lasting kayak rack. Some woods handle outdoor conditions better than others and offer different levels of strength and appearance.
- Cedar: Lightweight, naturally resistant to moisture and decay, cedar is ideal for outdoor racks. Its pleasant aroma and reddish hue also add beauty.
- Teak: Extremely durable and water-resistant, teak is perfect for racks exposed to sun and rain. Its rich color gives a luxurious look.
- Pine: Affordable and easy to work with, pine is suitable for indoor or covered storage, but it requires sealant for outdoor use.
- Redwood: Naturally rot-resistant and long-lasting, redwood combines durability with an attractive natural finish.
- Pressure-Treated Wood: Treated for outdoor use, this wood resists rot and insects, making it practical for dock or backyard racks.
Key Features of a Good Wooden Kayak Rack

A good wooden kayak rack is more than just a place to store your kayak; it’s an investment in protecting your equipment and making your outdoor or indoor space organized and functional. Here’s a closer look at the features that make a wooden rack reliable and user-friendly:
- Strength and Weight Capacity: The primary function of any kayak rack is to hold the weight of your kayak safely. Wooden racks are naturally sturdy, but the thickness and type of wood determine how much weight they can handle. For multiple kayaks, look for racks with reinforced joints or crossbeams to evenly distribute the load. A strong rack prevents bending, tipping, or collapsing, keeping both your kayaks and people safe.
- Weather Resistance: If your rack is outdoors, it will face rain, sun, humidity, and sometimes snow. Wood like cedar, teak, or redwood naturally resists decay, but applying a sealant or varnish further protects it from moisture and UV damage. A weather-resistant finish ensures your rack lasts for years without warping, cracking, or losing its color.
- Stable Design: Stability is critical, especially for freestanding or dock-mounted racks. Wide bases, cross supports, or wall/ceiling mounts prevent wobbling. Some racks include angled arms or rubber padding to grip kayaks firmly, reducing the risk of tipping or sliding during storage.
- Adjustable Arms or Slots: Kayaks come in different shapes and sizes, from narrow racing kayaks to wide recreational models. Adjustable arms, slotted supports, or modular racks allow you to customize the space for each kayak. This flexibility makes the rack versatile for future kayaks or other watercraft, like canoes or paddleboards.
- Ease of Access: Loading and unloading a kayak should be effortless. Features like angled racks, padded supports, or lift-assist designs reduce the strain on your back and prevent scratches. A well-thought-out design also ensures kayaks are easy to grab when needed without disturbing other stored kayaks.
- Aesthetic Appeal: Wooden racks offer a warm, natural look that complements outdoor spaces like docks, gardens, and patios. With proper finishing, they can even enhance indoor spaces such as garages or basements. Unlike metal or plastic racks, wood can be carved, stained, or painted to match your personal style, making it both functional and decorative.
In short, a high-quality wooden kayak rack combines durability, safety, and style. Paying attention to these features ensures your rack not only protects your kayaks but also enhances your storage space, whether indoors or by the water.
DIY Wooden Kayak Rack: Step-by-Step Guide
Building your own wooden kayak rack can be a rewarding project, giving you a custom storage solution that fits perfectly in your space. A DIY rack also allows you to choose the wood, design, and finish to match your style while saving money compared to pre-built options. Here’s a detailed step-by-step guide to help you create a strong, stylish, and functional wooden kayak rack:
Tools and Materials Needed
Before starting, gather these tools and materials:
- Wood of your choice (cedar, pine, redwood, or teak)
- Saw (hand saw or circular saw)
- Drill and drill bits
- Screws and bolts
- Sandpaper or electric sander
- Wood glue (optional for extra strength)
- Measuring tape and pencil
- Level
- Wood sealant, varnish, or outdoor paint
- Rubber padding or foam (for kayak support)
Having all tools ready ensures the project goes smoothly and safely.
Step 1: Planning and Measurements
Measure your kayak(s) and the area where you want to place the rack. Decide whether it will be freestanding, wall-mounted, ceiling-mounted, or dock-mounted. Sketch your design with precise measurements. Consider:
- Width and length of the rack
- Number of kayaks to store
- Space needed for easy access and movement
- Accurate planning prevents mistakes and ensures the rack fits perfectly
Step 2: Cutting and Preparing the Wood
Use your measurements to cut the wood to size. Sand each piece thoroughly to remove splinters and rough edges. Properly prepared wood makes assembly easier and creates a smooth finish, protecting both the rack and your kayak from scratches.
Step 3: Assembly and Securing Joints
Start assembling the base and main support structures. Use screws, bolts, and wood glue for strong joints. Make sure the rack is level and all parts are securely fastened. For multi-kayak racks, reinforce crossbars and arms to support extra weight.
Step 4: Adding Kayak Supports
Attach angled arms or horizontal supports where the kayak will rest. Consider adding rubber padding or foam to protect your kayak’s hull. Adjustable arms are helpful if you plan to store different types or sizes of kayaks in the future.
Step 5: Sanding and Finishing
Sand the entire rack again to smooth rough edges and surfaces. Apply a weatherproof sealant, varnish, or outdoor paint to protect the wood from moisture, UV rays, and insects. This step extends the life of your rack and enhances its appearance.
Step 6: Installing or Setting Up
Place the rack in its designated spot. Freestanding racks should sit on a level surface, wall-mounted racks should be anchored securely to studs, and ceiling-mounted racks should be bolted into strong beams. Double-check stability before placing your kayak(s) on the rack.
Safety Tips While Building
- Wear safety goggles and gloves while cutting or drilling.
- Keep tools away from children and pets.
- Avoid overloading the rack to prevent tipping or breaking.
- Regularly inspect the rack for loose screws or wear, especially if placed outdoors.
A DIY wooden kayak rack allows you to create a storage solution tailored to your needs, combining strength, style, and functionality. With careful planning and attention to detail, your rack will protect your kayaks and enhance your space for years to come.
Maintenance and Care for Wooden Kayak Racks
A wooden kayak rack, whether DIY or store-bought, is a long-term investment. Proper maintenance ensures it remains strong, attractive, and safe for years. Without care, wood can warp, crack, or develop mold, especially when exposed to outdoor elements like sun, rain, and humidity. Here’s a detailed guide on maintaining and caring for your wooden kayak rack:
1. Regular Cleaning
Dirt, dust, leaves, and bird droppings can accumulate on your rack over time. Clean your rack at least once every few months with a soft brush, mild soap, and water. For outdoor racks, a garden hose works well to rinse off debris. Avoid harsh chemicals, as they can damage the wood or remove protective coatings. Regular cleaning keeps the rack looking good and prevents buildup that can cause rot.
2. Reapplying Sealant or Varnish
Even durable woods like cedar, teak, or redwood benefit from occasional sealing. Reapply a protective wood sealant, varnish, or outdoor-grade wood oil once a year, or more often if the rack is exposed to harsh weather. This layer protects the wood from moisture, UV rays, and pests while preserving its natural color and beauty.
3. Inspecting for Damage
Periodically check your rack for signs of wear, including:
- Loose screws or bolts
- Cracks or splits in the wood
- Warping or sagging supports
- Mold or mildew growth
Early detection allows you to fix small problems before they become major issues, keeping your rack safe and stable.
4. Protecting from Weather
Outdoor racks are exposed to rain, sun, and snow, which can deteriorate wood over time. Consider these tips:
- Place the rack under a covered area if possible.
- Use waterproof covers during heavy rain or winter.
- Elevate the rack slightly from the ground to prevent water absorption.
Even with weather-resistant wood, protection extends the lifespan and keeps your kayaks safe.
5. Seasonal Care
During extreme seasons like summer or winter, extra precautions help maintain your rack:
- In summer, check for sun damage or drying cracks.
- In winter, remove snow or ice accumulation to prevent stress on the wood.
- For indoor racks, keep humidity levels moderate to avoid swelling or shrinking of wood.
6. Lubricating Moving Parts
If your rack has adjustable arms, pulleys, or other moving components, lubricate them periodically. This ensures smooth operation and prevents rust or corrosion on screws and metal parts.
Proper maintenance of a wooden kayak rack keeps it functional, attractive, and safe for years. A little effort, such as regular cleaning, sealing, and inspection, prevents costly repairs or replacements while ensuring your kayaks remain well-protected and ready for your next adventure.
Placement Ideas for Wooden Kayak Racks
Choosing the right location for your wooden kayak rack is just as important as selecting the right type of rack. Proper placement ensures that your kayaks remain safe, accessible, and protected from environmental damage. Here’s a detailed guide on the best placement options for different spaces:
1. Backyard or Garden Storage
For homeowners with outdoor space, placing a wooden kayak rack in the backyard or garden is a convenient option. This setup keeps your kayak close to your home while freeing up indoor storage areas. Consider:
- Place the rack on a level surface to prevent tipping.
- Positioning it under a tree or canopy to provide shade and protect the kayak from direct sunlight, which can fade colors and weaken materials.
- Adding gravel or concrete pads underneath the rack to avoid contact with wet soil, which can cause wood rot over time.
This setup works particularly well for freestanding racks and allows for easy access when preparing for a weekend on the water.
2. Garage or Shed Storage
Indoor storage protects kayaks from extreme weather, prolonging their lifespan. Wooden racks in garages or sheds offer:
- Protection from sun, rain, and snow, reducing maintenance needs.
- Space efficiency, by using wall-mounted or ceiling-mounted racks frees up valuable floor space.
- Accessibility, as kayaks can be easily loaded onto vehicles or carried to nearby water sources.
Tips for indoor placement: Ensure sufficient clearance for kayak height and length, and consider adjustable racks to accommodate different kayak sizes. Using rubber padding or foam on the supports prevents scratches to your kayak’s hull.
3. Dock or Waterfront Storage
For paddlers with direct water access, a dock-mounted wooden kayak rack is ideal. It provides convenience for launching and retrieving kayaks while keeping them safe:
- Place the rack close to the water’s edge, but high enough to avoid splashes or flooding.
- Secure the rack firmly into the dock to prevent tipping due to waves or wind.
- Consider adding a small roof or canopy if the dock is exposed to strong sun or rain.
Dock racks save time and effort, making it easy to enjoy spontaneous paddling trips without the hassle of transporting the kayak from storage.
4. Cabin or Vacation Home Storage
If you own a cabin or vacation property near a lake, wooden kayak racks can be a permanent and stylish storage solution:
- Use rustic or natural wood finishes that blend with the outdoor surroundings.
- Ceiling-mounted racks inside a cabin or boathouse can save space while keeping kayaks safe from curious animals or harsh weather.
- Freestanding racks outside can double as a display, enhancing the aesthetic of the property while providing functional storage.
5. Tips for Choosing the Best Spot
- Accessibility: Place the rack where it’s easy to reach and move kayaks in and out. Avoid crowded or cluttered areas.
- Protection from Elements: If outdoors, aim for shade or partial shelter to protect wood and kayak from sun and rain.
- Safety: Ensure the rack is stable and on a level surface. Avoid areas with high foot traffic to prevent accidents.
- Convenience: Consider proximity to vehicles or water, depending on how often you use your kayak.
Proper placement not only protects your kayak but also enhances the functionality and aesthetic of your storage area. Thoughtful positioning ensures your rack serves both practical and visual purposes, making it a valuable addition to your home or outdoor space.
Pros and Cons of Wooden Kayak Racks
Wooden kayak racks offer many advantages, but like any storage solution, they also come with a few drawbacks. Understanding the pros and cons helps paddlers make an informed decision about whether a wooden rack is the right choice.
Pros of Wooden Kayak Racks
- Strength and Durability:
High-quality wood, such as cedar, teak, or redwood, provides a solid structure capable of holding one or multiple kayaks safely. Properly treated wood resists warping and cracking, making the rack long-lasting. - Natural Beauty and Style:
Wooden racks add a warm, natural look to any space. Whether placed in a backyard, dock, garage, or cabin, they blend beautifully with outdoor or indoor environments, giving both functionality and aesthetic appeal. - Customizable Design:
Wood is easy to cut, shape, and finish, allowing you to create a rack tailored to your specific space and kayak size. DIY enthusiasts can design unique racks that meet personal storage needs and style preferences. - Eco-Friendly Option:
Wood is a renewable resource, making it a sustainable choice compared to metal or plastic racks. Choosing responsibly sourced wood ensures minimal environmental impact. - Versatility:
Wooden racks come in various types, freestanding, wall-mounted, ceiling-mounted, or dock-mounted, offering flexibility depending on available space and storage requirements.
Cons of Wooden Kayak Racks
- Maintenance Requirements:
Wood needs regular care, including cleaning, sanding, and applying sealant or varnish to protect it from moisture, sun, and pests. Without proper maintenance, wooden racks can deteriorate faster than metal or plastic options. - Weight:
Wood is generally heavier than plastic, making freestanding racks less portable. Moving a large wooden rack can be challenging, especially if it stores multiple kayaks. - Cost:
High-quality hardwoods like teak or redwood can be expensive. While DIY racks save money on labor, premium wood and finishes may still require a significant investment. - Susceptibility to Outdoor Damage:
Even treated wood can eventually be affected by prolonged exposure to harsh weather conditions, such as heavy rain, snow, or intense sunlight. Proper placement and protective treatments are essential to maintain the rack’s longevity.
Overall, the pros of wooden kayak racks, strength, style, and versatility, often outweigh the cons for most paddlers. While they require some maintenance and investment, the durability, aesthetic appeal, and customizability make wooden racks a popular choice for long-term kayak storage.
Safety Tips for Using Wooden Kayak Racks
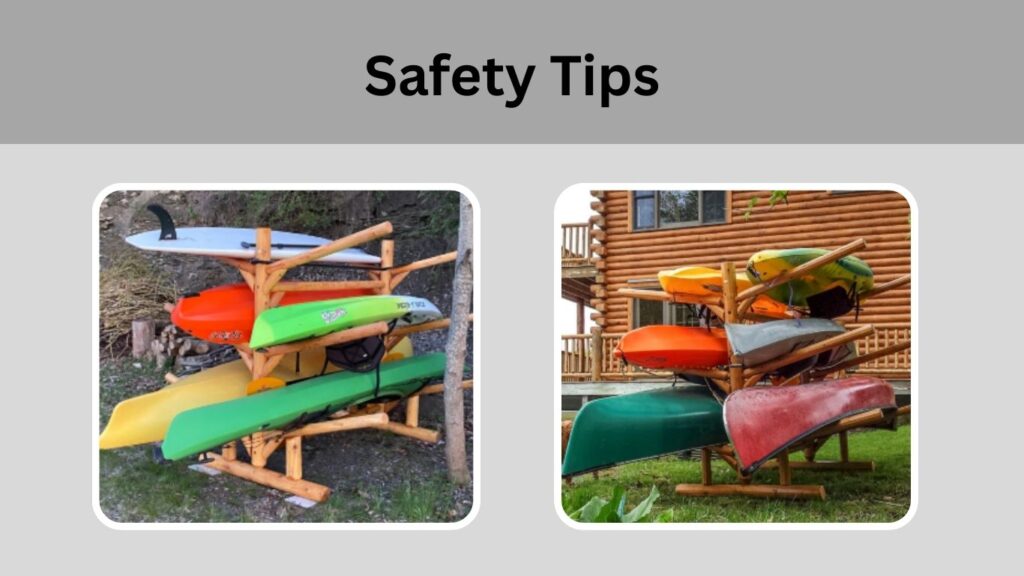
While wooden kayak racks are designed to be sturdy and reliable, following proper safety practices ensures both your kayaks and the surrounding areas remain protected. Accidents can happen if racks are overloaded, improperly installed, or poorly maintained. Here’s a detailed guide to using wooden kayak racks safely:
1. Secure Placement and Installation
- Level Surface: Always place freestanding racks on a flat, stable surface. Uneven ground can cause the rack to tip, especially when loading or unloading kayaks.
- Anchoring Wall or Ceiling Racks: Wall-mounted or ceiling-mounted racks should be securely anchored into studs or beams capable of supporting the weight of the kayaks. Avoid attaching racks to drywall or thin panels that cannot bear heavy loads.
- Dock-Mounted Safety: For racks on docks, ensure they are firmly bolted and reinforced. Waves, wind, or uneven foot traffic can destabilize poorly anchored racks.
2. Weight Distribution
- Even Loading: Distribute weight evenly across the rack to prevent tipping or structural stress. Avoid placing all heavy kayaks on one side.
- Single vs. Multi-Kayak Storage: If your rack is designed for multiple kayaks, ensure each support is capable of bearing the weight of a fully loaded kayak. Adjustable arms or crossbars should be properly secured before use.
3. Using Padded Supports
- Wooden racks can scratch or dent kayaks if the supports are bare. Always use rubber, foam, or carpet padding on the arms and surfaces that contact the kayak. This not only protects the kayak but also prevents slipping.
4. Safe Loading and Unloading Practices
- Team Effort for Heavy Kayaks: For larger kayaks, enlist help when lifting to avoid straining your back or dropping the kayak.
- Lift Properly: Bend your knees and keep your back straight while lifting. Use smooth, controlled movements to place the kayak on the rack.
- Angle Adjustment: If the rack has angled arms, ensure the kayak is aligned correctly before releasing it to prevent tipping or sliding.
5. Regular Inspection
- Periodically check for loose screws, cracked wood, or warped supports. Early detection prevents accidents and maintains the rack’s integrity.
- Check for signs of rot, especially if the rack is exposed to water or moisture. Replace any compromised wood immediately to avoid collapse.
6. Environmental Considerations
- Protect from Sun and Rain: Prolonged exposure to the elements can weaken wood over time. Consider shade, covers, or canopies to reduce UV damage and water absorption.
- Avoid Obstructions: Keep the area around the rack clear of debris, rocks, or other obstacles that could cause tripping or interfere with loading and unloading.
7. Multi-Purpose Safety
- Some racks also hold paddles, life jackets, or other gear. Ensure these items are securely hung or stored so they don’t fall onto the kayaks or the floor, preventing accidents.
8. Child and Pet Safety
- Keep children and pets away from racks while loading or unloading kayaks. A falling kayak or a tipping rack can cause serious injury.
- Consider adding signs or barriers in shared or high-traffic areas to remind others to be cautious around the rack.
By following these safety tips, you ensure your wooden kayak rack remains a secure and reliable storage solution. Proper placement, careful loading, regular maintenance, and mindful use protect both your kayaks and anyone interacting with the rack, giving you peace of mind every time you store or retrieve your kayak.
Final Thoughts
A wooden kayak rack is more than just a storage solution; it’s a blend of strength, style, and functionality. With the right wood, proper design, and careful maintenance, these racks protect your kayaks from damage while enhancing the beauty of your space. Whether you choose a DIY project or a pre-built option, wooden racks offer versatility, durability, and aesthetic appeal that metal or plastic alternatives often lack. Investing in a quality wooden rack ensures your kayaks remain safe, organized, and ready for every adventure.