Before fishing, it’s important to spool your reel correctly, which means adding new fishing line so it’s ready to cast. Poor spooling can cause tangles, twists, and short casts, while proper spooling helps your reel work smoothly and cast farther. The process is simple; you just need your reel, fishing line, and a few easy steps. This guide covers how to spool spinning, baitcasting, and spincast reels, choose the right line, and avoid common mistakes for a trouble-free fishing trip.
Understanding Fishing Reels and Lines
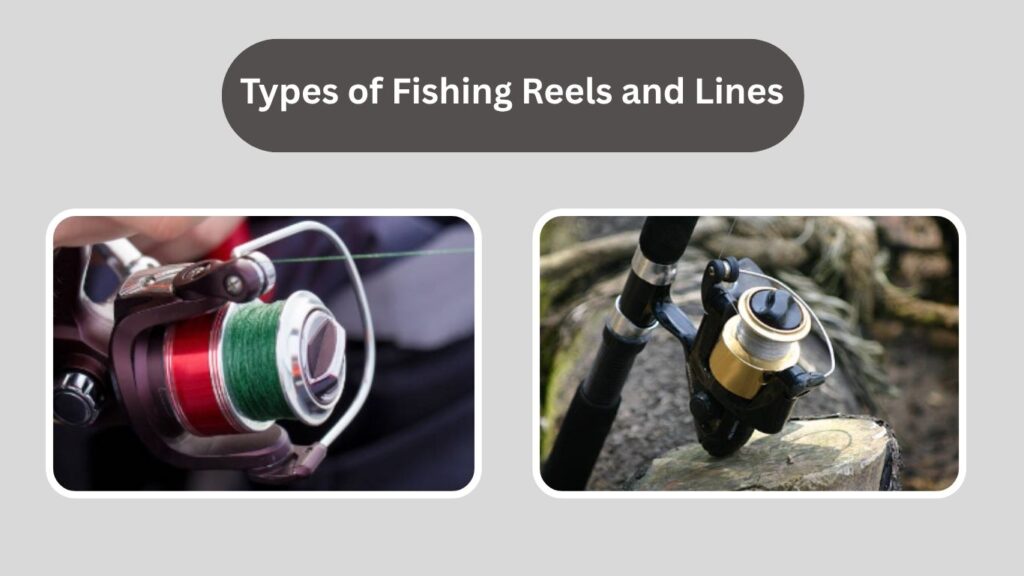
Before you start spooling your reel, it’s important to understand the different types of reels and fishing lines. Each reel works a bit differently, and the line you choose can change how you spool it. Knowing these basics will make the process easier and help you avoid problems like twists or tangles.
Types of Fishing Reels
Spinning Reels
- These are the most common reels you’ll see and are perfect for beginners.
- They are mounted underneath the fishing rod, which makes them easy to hold and balance.
- The fishing line comes off the spool in loops, making it simple to cast long distances.
- Best for light to medium fishing, like catching bass, trout, or panfish.
Baitcasting Reels
- These reels are popular with more experienced anglers because they offer more control and power.
- They sit on top of the fishing rod, and the line comes off in a straight line, which helps with accuracy.
- They handle heavier fishing lines and are great for catching larger fish, but they can be tricky for beginners because of “backlashes” (line tangles).
Spincast Reels
- These are the easiest reels to use, especially for kids and beginners.
- They have a closed face with a simple push-button to cast the line.
- While very beginner-friendly, they’re not built for heavy fishing or very long casts.
Fly Reels
- These are used for fly fishing, a special style where you cast a very light lure (the “fly”).
- The spooling process is different, so we won’t cover it in detail here.
Types of Fishing Lines
Monofilament
- This is the most common and affordable fishing line.
- It’s soft, stretchy, and easy to handle, which makes it perfect for beginners.
- It works well for most types of fishing but can have more “memory,” meaning it may hold coils from the spool.
Fluorocarbon
- This line is nearly invisible underwater, which helps when fish are easily spooked.
- It sinks quickly, making it great for lures that go deep.
- It’s stiffer than monofilament, so it can be harder to handle for beginners.
Braided Line
- This line is very strong for its thickness, so you can use a thinner line while still handling big fish.
- It has no stretch, which helps you feel bites better and set the hook quickly.
- Because it’s smooth and can slip on the spool, it usually needs a backing layer of monofilament underneath so it grips the reel.
Step 1: Prepare Your Reel
Before you start adding fishing line, it’s important to prepare your reel and rod properly, as this helps the line load evenly and prevents problems later. First, securely attach your reel to your fishing rod. This keeps the reel steady while spooling, so your hands are free to hold the line and turn the handle, and it prevents the line from twisting or winding unevenly.
Next, check the reel’s line capacity, which is usually printed on the side, showing something like “8 lb / 200 yds” or “10 lb / 140 yds.” This tells you the maximum line weight (pound test) and how many yards of line the reel can hold. Avoid overfilling, as it can lead to tangles, and don’t underfill, as it can shorten your casting distance.
After checking, clean the spool by wiping away any dirt, sand, or leftover line with a dry cloth, since debris can cause snags or uneven spooling. Finally, loosen the drag, the knob on your reel that controls how much pressure is needed for the line to pull out. Loosening it helps protect the drag system and allows the spool to spin more freely as you add the line.
Step 2: Attach the Line to the Reel
Once your reel is prepared, the next step is to secure the fishing line so it doesn’t slip when you start winding. Begin by threading the line through the first and largest rod guide, which is the big ring closest to the reel. This keeps the line straight and reduces tangles during spooling. Next, wrap the line around the reel spool twice, as the loops help hold the line in place while you tie your knot.
Tie the line securely to the spool using an Arbor Knot or another strong knot, making sure it is snug and won’t slide under tension. If you are using braided line, which is slick and can easily spin on the spool, first add a few yards of monofilament as a backing layer, then connect the braid to the mono using a Double Uni Knot to prevent slipping and stop the braid from digging into itself.
Finally, trim any excess line sticking out from your knots to keep them smooth, ensuring the line wraps evenly without catching or snagging on the spool.
Step 3: Spooling the Line (Spinning Reel Method)
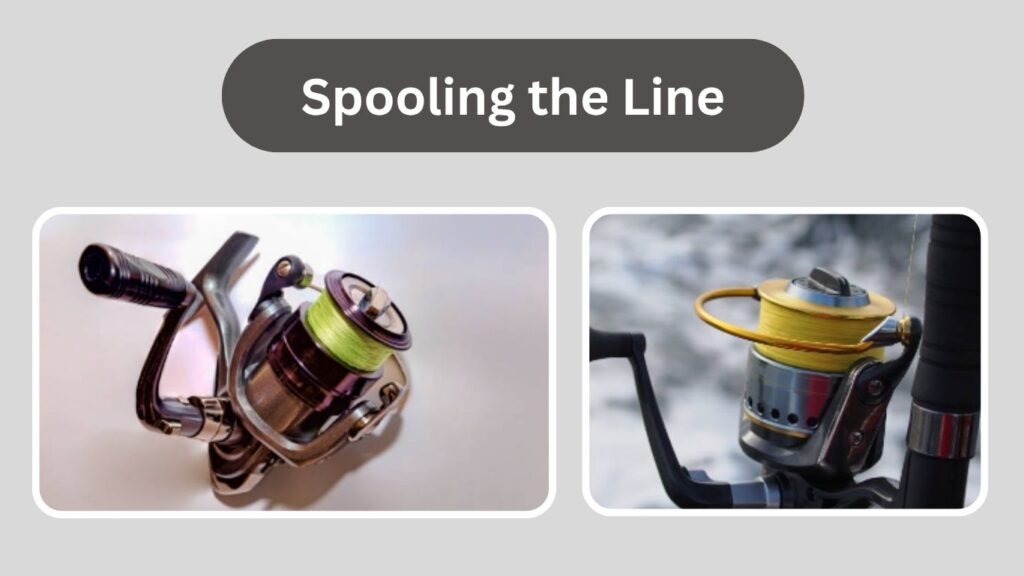
Spooling your line correctly is one of the most important parts of setting up your fishing gear. If you do it wrong, you could face problems like line twists, wind knots, or even your line coming off the spool mid-cast. Below is a step-by-step breakdown for the three most common reel types.
Spooling a Spinning Reel (Best for Beginners)
Spinning reels are the most common for new anglers because they’re easy to use and versatile. But if you don’t spool them the right way, line twist can quickly ruin your fishing trip.
Step-by-Step:
- Position the Line Spool Correctly
- Place your fishing line spool flat on the ground, with the label facing up.
- This ensures the line comes off the spool in the same direction it goes onto your reel, which helps prevent line twist.
- If you notice the line twisting as you reel, flip the spool over.
- Place your fishing line spool flat on the ground, with the label facing up.
- Thread the Line Through All the Rod Guides
- Start at the tip of the rod and work your way down through each guide.
- Make sure the line is not looped around the rod or crossed over itself.
- Start at the tip of the rod and work your way down through each guide.
- Hold the Line with Gentle Tension
- Pinch the line lightly between your fingers (or use a soft cloth to protect your hands).
- The tension keeps the line tight on the spool, preventing loose coils that cause tangles later.
- Pinch the line lightly between your fingers (or use a soft cloth to protect your hands).
- Start Reeling Slowly
- Turn the reel handle at a steady pace.
- Watch as the line lies on the spool; it should wrap evenly from edge to edge, not pile up in one spot.
- Turn the reel handle at a steady pace.
- Check for Twists Frequently
- Every 15–20 turns, stop reeling and pull out a few feet of line.
- If the line starts forming loops or coils, flip the line spool and continue.
- Every 15–20 turns, stop reeling and pull out a few feet of line.
- Fill the Spool (But Don’t Overfill)
- Stop when the line is about 1/8 inch below the edge of the spool.
- Overfilling can cause the line to spill off when you cast; underfilling will reduce your casting distance.
- Stop when the line is about 1/8 inch below the edge of the spool.
- Cut and Secure the Line
- Leave about 6–12 inches of extra line.
- Tie it to the reel’s line clip (if it has one) or secure it to the last rod guide to keep it from unraveling.
- Leave about 6–12 inches of extra line.
Spooling a Baitcasting Reel (For Experienced Anglers)
Baitcasting reels are great for heavier lines and lures but require more care to avoid backlashes (tangles). Proper spooling helps the line lay evenly, which is key for smooth casting.
Step-by-Step:
- Set Up the Line Spool
- Place your line spool on a spool holder or have someone hold it horizontally with a pencil through the center.
- The line should come off the spool in the same direction it goes onto your reel (usually straight, not twisting off the side).
- Place your line spool on a spool holder or have someone hold it horizontally with a pencil through the center.
- Thread the Line Through the Rod Guides
- Start at the tip and thread through each guide, ending at the reel.
- Pass the line through the level wind guide (the small opening that moves back and forth on the reel).
- Start at the tip and thread through each guide, ending at the reel.
- Attach the Line to the Spool
- Wrap the line around the reel spool twice and tie it using an Arbor Knot (or another secure knot).
- Make sure it’s tight so the line doesn’t slip when you start reeling.
- Wrap the line around the reel spool twice and tie it using an Arbor Knot (or another secure knot).
- Keep Tension While Spooling
- Hold the line with your fingers or use a cloth to apply light, steady pressure.
- This prevents loose wraps, which can dig into the spool and cause backlashes.
- Hold the line with your fingers or use a cloth to apply light, steady pressure.
- Reel Slowly and Evenly
- Turn the handle at a controlled speed.
- Watch how the line lies; your reel’s level wind mechanism will help distribute it evenly, but guide it gently if needed.
- Turn the handle at a controlled speed.
- Stop at the Right Fill Level
- Stop spooling when the line is 1/8 inch below the edge of the spool.
- Too many lines can lead to overrun (backlash); too few will cut your casting distance.
- Stop spooling when the line is 1/8 inch below the edge of the spool.
Spooling a Spincast Reel (Closed-Face Reel)
Spincast reels are simple and beginner-friendly, but spooling requires removing the cover to reach the spool inside.
Step-by-Step:
- Remove the Reel Cover
- Unscrew or pop off the front cover of your spincast reel to access the spool.
- Keep the cover nearby so you don’t lose it.
- Unscrew or pop off the front cover of your spincast reel to access the spool.
- Tie the Line to the Spool
- Wrap the line around the spool and tie it securely with an Arbor Knot.
- Pull it snug so it won’t slip as you reel.
- Wrap the line around the spool and tie it securely with an Arbor Knot.
- Reel Slowly While Holding Tension
- As with other reels, keep the line tight between your fingers to avoid loose wraps.
- Turn the handle slowly, watching the line as it fills the spool.
- As with other reels, keep the line tight between your fingers to avoid loose wraps.
- Fill the Spool (Leave Some Space)
- Stop spooling when the line is slightly below the edge of the spool.
- Overfilling can cause jams when casting.
- Stop spooling when the line is slightly below the edge of the spool.
- Reattach the Cover and Pull the Line Through
- Put the cover back on securely.
- Pull the line through the hole in the front so it’s ready to use.
- Put the cover back on securely.
Spooling a fishing reel the right way is one of the simplest but most important steps to make your fishing trip smooth and enjoyable. Whether you’re using a spinning reel, a baitcasting reel, or a spincast reel, taking the time to prepare your gear, attach the line correctly, and spool with proper tension helps prevent common issues like twists, tangles, and backlashes.
Filling the spool to the correct level and using the right knots, especially with braided line, ensures your line stays secure and performs well when casting and reeling in fish. With these easy steps, you’ll be able to cast farther, fish more effectively, and avoid the frustrations that come with poorly spooled reels, so you can focus on enjoying your time on the water.