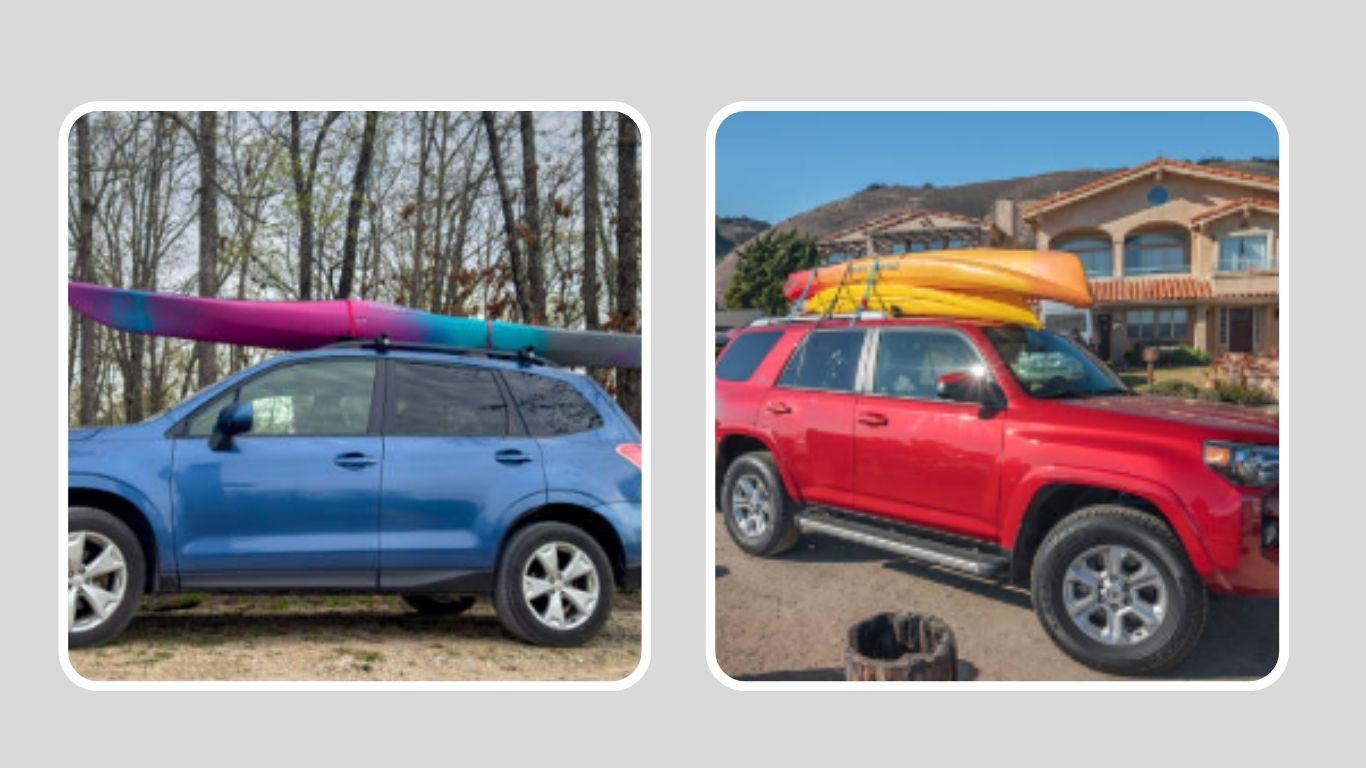
Transporting a kayak can seem tricky, especially if it’s your first time loading one onto your car. Kayaks are long, bulky, and awkward to handle, so making sure they are properly strapped down is very important for safety. A secure tie-down prevents damage to your kayak, your vehicle, and most importantly, keeps other drivers safe on the road. With the right roof rack, straps, and technique, strapping a kayak becomes much easier. This guide will walk you through everything step by step.
Why Properly Strapping a Kayak Matters
When you’re transporting a kayak, the way you strap it to your roof rack is just as important as the driving itself. Kayaks are not only large and heavy, but they also have an odd shape that catches the wind easily. If a kayak is not strapped properly, it can shift while driving, slide off the car, or even fly into traffic. This isn’t just dangerous for you—it can also put other drivers at serious risk.
A secure strapping method ensures that your kayak stays in place no matter how fast you’re going or how bumpy the road is. It also prevents damage to the kayak itself. A loose or poorly tied kayak can rub against the rack or car roof, causing scratches, dents, or cracks in the hull. Repairing a damaged kayak can be expensive, so spending a few extra minutes to secure it properly is always worth it.
Strapping the kayak correctly also gives you peace of mind while driving. Instead of constantly worrying if the boat is moving around, you can focus on the road ahead. For long trips, highway driving, or windy conditions, this sense of security is invaluable. Even short drives can be risky if the kayak isn’t tied down the right way.
Finally, proper strapping is about respecting safety rules and protecting everyone around you. In many places, drivers are legally responsible for anything that falls off their vehicle. That means if your kayak comes loose and causes an accident, you could face fines, insurance claims, or even lawsuits. So, learning the right way to strap a kayak isn’t just a skill; it’s a responsibility every paddler should take seriously.
Types of Roof Racks for Kayaks
Before you strap your kayak, you need to understand the type of roof rack you’re working with. Not all roof racks are the same, and the method of strapping can vary slightly depending on the setup. Knowing what kind of rack you have will help you secure the kayak most safely and efficiently.
1. Crossbar Roof Racks
This is the most common type of rack. It consists of two bars that run across the roof of your car, from one side to the other. Kayaks rest directly on these bars, and straps are looped over them to keep the kayak in place. Crossbars are strong, stable, and widely compatible with most vehicles, which makes them a favorite for paddlers. They can be used alone or with attachments like cradles and J-racks.
2. J-Cradle Racks
J-cradles are attachments that mount to crossbars. They hold the kayak on its side in a tilted “J” position. This design saves space on the roof, allowing you to carry more than one kayak or other gear like bikes. J-cradles also make it easier to load the kayak from the side of the car, since you don’t have to lift it onto the roof. The straps are looped through the cradle and over the kayak, holding it snug against the rack.
3. Saddle Racks
Saddle-style racks hold the kayak upright in a horizontal position, with small padded supports under the hull. They are excellent for keeping the kayak stable during transport, and the padding reduces the chance of scratches or dents. With saddle racks, you usually use straps to secure the kayak to the saddles as well as bow and stern tie-downs for extra security.
4. Stackers
Stackers are designed for carrying multiple kayaks, especially on whitewater trips where paddlers often travel in groups. They allow you to stand kayaks on their edges, side by side, and secure them with straps. This style is practical for smaller kayaks but may not be the best option for long or heavy touring kayaks.
5. Temporary Foam Blocks
For those without a roof rack system, foam blocks can be placed on top of the car’s roof to cushion and support the kayak. The kayak rests on the foam, and straps run through the car doors to hold it down. While not as stable as crossbars or cradles, foam blocks are a budget-friendly option for short trips or occasional transport.
6. Inflatable Roof Racks
An alternative to foam blocks is inflatable roof racks. They can be pumped up and placed on the roof to provide cushioning for the kayak. Like foam blocks, straps run through the car doors to secure the kayak. Inflatable racks are portable and easy to store, but they don’t provide the same level of security as permanent racks.
Each rack type has its strengths and weaknesses, but the method of strapping always comes down to one key rule: the kayak must be snug, balanced, and unable to shift. Once you know what kind of rack you’re working with, the strapping process becomes much clearer.
Tools and Straps You’ll Need
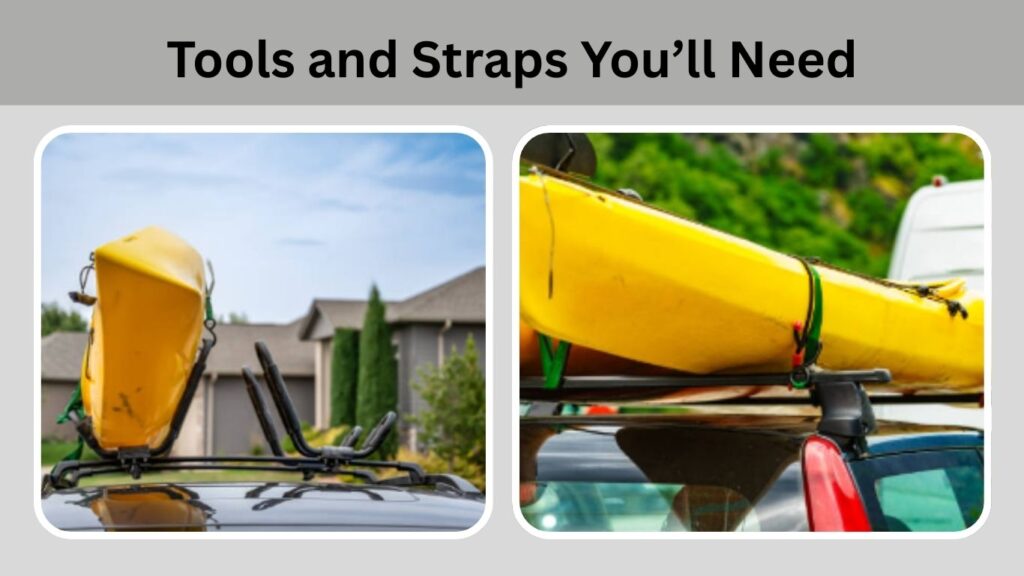
Before you start strapping your kayak, it’s important to gather the right tools. Using the proper equipment not only makes the process easier but also ensures that your kayak stays safe and secure throughout the trip. Strapping a kayak isn’t complicated, but trying to do it with the wrong gear can quickly turn into frustration or worse, a safety hazard.
1. Cam Straps
The most essential tool for strapping a kayak is a pair of cam straps. These are strong nylon straps with a metal cam buckle at one end. You feed the strap through the buckle, pull it tight, and it locks in place. Cam straps are easy to use, quick to tighten, and don’t require complicated knots. They also won’t slip if properly tightened. Most paddlers prefer cam straps over rope for their simplicity and reliability.
2. Ratchet Straps (With Caution)
Ratchet straps are another option, but they can be risky if overtightened. They use a ratcheting mechanism that allows you to pull the strap extremely tight. While this is good for heavy loads, it can easily crush or dent a kayak’s hull if you’re not careful. If you use ratchet straps, apply gentle pressure and never crank them down too hard. For beginners, cam straps are usually the safer choice.
3. Bow and Stern Lines
In addition to straps over the roof rack, you’ll also need bow and stern tie-downs. These are ropes or straps that secure the front (bow) and back (stern) of the kayak to the bumpers or tow hooks of your car. They prevent the kayak from shifting forward or backward during sudden stops or strong winds. Bow and stern lines are especially important for highway driving.
4. Rope (As Backup)
Strong, non-stretch rope can be used if straps aren’t available. You’ll need to know how to tie secure knots, like a trucker’s hitch, to make sure the kayak stays in place. Rope is versatile and works in many situations, but for most people, cam straps are easier and faster. Rope can still be handy as a backup or for extra tie-down points.
5. Padding or Protectors
Foam blocks, rubber mats, or protective pads can be placed under the kayak or between the straps and the hull. This prevents scratches and helps distribute pressure evenly across the boat. Padding is especially helpful if you have a delicate fiberglass kayak or a brand-new car roof you don’t want scratched.
6. Step Stool or Ladder (Optional)
If your car is tall, like an SUV or truck, a small step stool or folding ladder can make it much easier to reach over the roof. This saves time and prevents straining your back while trying to throw straps over the kayak.
7. Roof Rack Accessories
Depending on your setup, you may need attachments like J-cradles, saddles, or stackers. These aren’t mandatory, but they make strapping quicker, more stable, and more secure, especially if you transport kayaks often.
Having the right tools makes all the difference. With cam straps, bow and stern lines, and some basic padding, you’ll have everything you need to safely secure your kayak for the road ahead.
Step-by-Step Guide: How to Strap a Kayak to a Roof Rack
Strapping a kayak might feel intimidating the first few times, but once you understand the process, it becomes second nature. The key is to take your time, double-check everything, and follow the same routine each time. Below is a clear, step-by-step method that works for most roof rack setups.
Step 1: Position the Kayak Correctly
Start by lifting the kayak onto the roof of your car. This can be done solo if the kayak is light and the vehicle is low, but for heavier kayaks or taller vehicles, having a partner makes it much easier. Always lift with your legs, not your back, to avoid injury.
The kayak should be centered on the roof rack so that the weight is evenly distributed. Place the kayak hull-side down (for most racks) unless you’re using J-cradles, which hold it on its side. Make sure the kayak sits flat and doesn’t rock back and forth.
For crossbars, align the kayak so it rests securely over both bars. It shouldn’t stick out too far on either side. Ideally, the kayak should extend evenly at the front and back of the car. If it’s longer than your vehicle, that’s fine, but try to center it as much as possible for balance.
Step 2: Prepare the Straps
Take your cam straps and untangle them before you start. Throwing a messy strap over the car while it’s knotted can waste time and cause frustration. Hold the buckle end in one hand and toss the free end over the kayak to the other side of the car. Repeat this for the second strap, so you now have two straps draped across the kayak and roof.
For most kayaks, you’ll use two straps: one in front of the cockpit and one behind it. This ensures the kayak is secured at its heaviest points, keeping it stable during transport.
Step 3: Loop the Straps Around the Crossbars
Once both straps are over the kayak, kneel on one side of the car. Take the loose end of the strap and pass it under the crossbar, then bring it up to meet the buckle. This step is very important because looping around the crossbar prevents the kayak from lifting off the rack. Simply looping the strap under the kayak without securing the crossbar can allow the kayak to shift or even blow off in strong winds.
Feed the loose strap through the buckle and pull it tight. Don’t yank too hard—cam straps are designed to lock with steady pressure. Make sure the buckle sits flat against the kayak’s side, not directly on top, where it could dig into the hull.
Step 4: Tighten the Straps
Once both straps are in place, begin tightening them. Apply firm but gentle pressure. The kayak should feel snug against the rack, but avoid over-tightening, which can warp the hull—especially on plastic kayaks.
A good rule of thumb is: the kayak should not move when you push against it, but the straps shouldn’t be so tight that they dig deep into the kayak’s body. After tightening, tuck away any excess strap so it doesn’t flap in the wind while driving.
Step 5: Secure the Bow and Stern
Now it’s time to add extra security. Use bow and stern lines to tie the kayak’s front and back to your car. Most vehicles have tow hooks or sturdy metal points under the bumpers where you can attach the ropes. If not, hood loops or aftermarket anchor straps can be installed.
Attach one line from the kayak’s bow handle to the front of the car and another from the stern handle to the back. Tighten them enough to remove slack, but don’t crank down so hard that you bend the kayak. These lines prevent forward and backward shifting, which is crucial during sudden stops or strong gusts of wind.
Step 6: Double-Check Everything
Once the kayak is strapped, walk around the car and check each point. Push the kayak side to side and front to back; it should feel solid, with little to no movement. Make sure the straps are flat against the kayak (not twisted) and the buckles are tight and secure.
It’s also smart to give the straps a quick tug after driving a short distance, especially if you’re going on a long trip. Straps can loosen slightly as the kayak shifts into place, so re-tightening ensures a secure hold.
Step 7: Drive with Care
With the kayak strapped and secure, you’re ready to go. Remember, a kayak adds extra height to your vehicle, so watch out for low bridges, garages, and drive-thru overhangs. Drive at a safe speed and avoid sudden swerves. While properly strapped kayaks can handle highway driving, taking corners more slowly helps reduce stress on the straps and roof rack.
How to Strap Multiple Kayaks
Sometimes one kayak isn’t enough, especially if you’re heading out with friends or family. Strapping two or more kayaks to a single roof rack is possible, but it requires extra care and the right setup. The way you do it depends on the size of your kayaks, your vehicle’s roof width, and the type of rack system you’re using.
1. Using J-Cradles for Two Kayaks
One of the easiest ways to carry multiple kayaks is with J-cradle racks. These hold kayaks on their sides, freeing up roof space. You can place one kayak in each cradle, leaving room for a second kayak or even a third on the other side of the roof. The J-shape naturally supports the kayak, and the straps loop around both the kayak and cradle for stability. This setup is great because it reduces the risk of the boats rubbing against each other.
2. Stacking Kayaks on Their Sides (With Stackers)
If you don’t have J-cradles, stackers are another option. These vertical posts mount on your crossbars and allow you to lean multiple kayaks against them, side by side. The kayaks are then strapped to the stacker and roof rack with cam straps. This method works well for smaller, lighter kayaks like whitewater or recreational models. However, with large touring kayaks or sea kayaks, stacking can be tricky due to their length and weight.
3. Carrying Two Kayaks Flat on Crossbars
If your car roof is wide enough, you can carry two kayaks flat on their hulls, directly on the crossbars. Place them side by side, making sure they are evenly balanced. Each kayak will need its pair of straps, looped around the crossbars just as you would for a single kayak. This method works best with narrow recreational kayaks or when using extra-wide crossbars. The downside is that it takes up a lot of space and may not leave room for other gear.
4. Adding Foam Blocks or Pads Between Kayaks
When transporting more than one kayak, it’s important to prevent them from rubbing against each other. Foam blocks, pool noodles, or specialized kayak pads can be placed between the boats to create a buffer. This prevents scratches and keeps the kayaks from shifting against one another during the drive.
5. Extra Strapping for Multiple Boats
When strapping down multiple kayaks, always use additional straps for stability. Each kayak should have at least two straps securing it to the crossbars, plus bow and stern lines for the group. It’s better to over-secure than under-secure when carrying multiple boats.
6. Weight and Vehicle Limitations
Always check your vehicle’s roof weight capacity before loading multiple kayaks. Roof racks and crossbars also have their limits. Overloading can damage your vehicle, strain the rack system, or create dangerous driving conditions. When in doubt, consult your car manual or the rack manufacturer’s guidelines.
7. Consider a Trailer for Multiple Kayaks
If you frequently transport three or more kayaks, or if your kayaks are especially long and heavy, investing in a small kayak trailer might be a safer option. Trailers keep the weight low to the ground, make loading easier, and eliminate the risk of damaging your vehicle’s roof.
Transporting multiple kayaks is completely possible with the right rack system and careful strapping. The most important rule is that each kayak must be individually secured; never rely on one strap to hold down more than one boat.
Common Mistakes to Avoid
Even with the right straps and a solid roof rack, many paddlers make small mistakes that can cause big problems on the road. Knowing what not to do is just as important as knowing the correct steps. Avoiding these common errors will save you stress, time, and potential damage.
1. Not Looping Straps Around the Crossbars
One of the biggest mistakes is simply tossing straps over the kayak and tightening them without securing them around the crossbars. Without looping under the bars, the kayak isn’t connected to the rack; it’s only pressed against it. A strong gust of wind or a sudden stop could send the kayak flying off. Always make sure straps go under the crossbars before tightening.
2. Over-Tightening the Straps
It’s natural to want the kayak as tight as possible, but pulling the straps too hard, especially with ratchet straps, can damage the kayak. Plastic hulls can warp, and fiberglass boats can crack under extreme pressure. Straps should be snug, not crushing. A good test is to push on the kayak: it shouldn’t move much, but the hull should not look pinched.
3. Forgetting Bow and Stern Lines
Some people skip bow and stern tie-downs, especially for short trips. While you might get away with it on back roads, it’s risky on highways. Without bow and stern lines, the kayak can shift forward or backward during braking or acceleration. This not only stresses the straps but also makes the load less stable. Always use front and back tie-downs for longer drives.
4. Using Old or Damaged Straps
Straps that are frayed, sun-damaged, or have weak buckles can fail when you least expect it. Always check your straps before each trip. If you see signs of wear, replace them. Straps are relatively inexpensive compared to the cost of a kayak or the consequences of one coming loose on the highway.
5. Skipping Strap Management
Loose strap ends flapping in the wind may seem like a minor annoyance, but they can create distracting noise, damage your vehicle’s paint, or even loosen the strap over time. After tightening, always tie off or tuck away excess strap. A simple half-knot around the crossbar or door handle can keep things neat and secure.
6. Placing the Kayak Upside Down on J-Cradles
J-cradles are designed for kayaks to rest on their sides, not upside down. Placing the boat incorrectly can lead to poor support and increase the chance of damage. Always follow the rack’s intended setup. If you’re unsure, check the manufacturer’s instructions.
7. Not Balancing the Load
Centering the kayak properly is crucial. If the kayak sticks out too far on one side, it throws off the vehicle’s balance and creates uneven wind resistance. This can make driving harder, especially at highway speeds. Always center the kayak on the rack or distribute weight evenly if carrying multiple boats.
8. Driving Without Checking the Straps
Even the best strapping job can loosen slightly as you drive. Skipping a quick check after 10–15 minutes on the road is a common mistake. It only takes a moment to pull over and tighten the straps if needed, and it could prevent a dangerous accident later.
9. Assuming All Roofs Can Handle Kayaks
Not every vehicle roof is designed for heavy loads. Placing a large kayak directly on a weak roof without proper racks or padding can cause dents and scratches. Always make sure your car’s roof rack system is rated for the weight you’re carrying.
Safety Tips for Highway and Long Trips
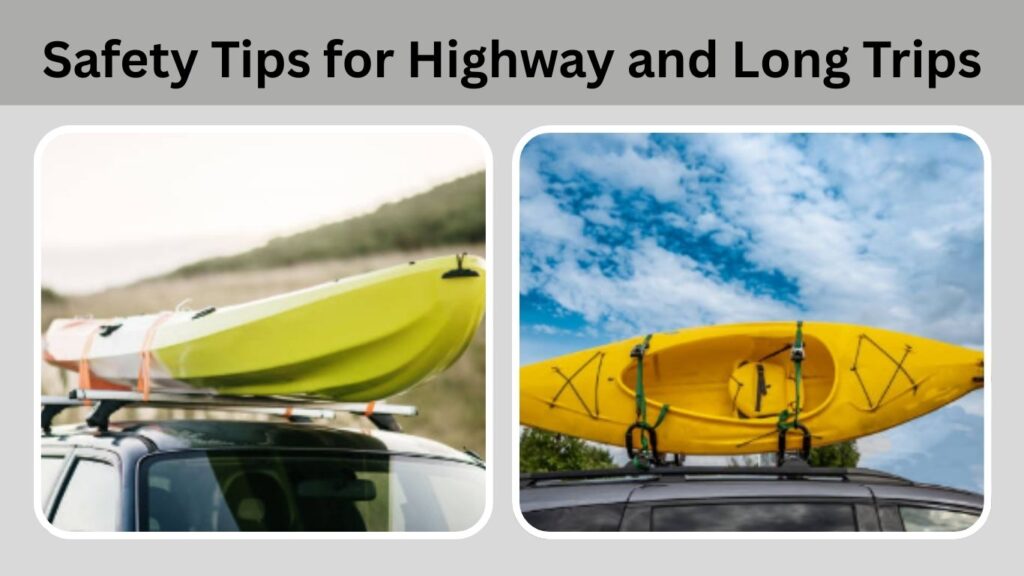
Strapping a kayak securely is only part of the process; driving with it is the other half. On highways and long journeys, the wind, speed, and road conditions all put extra stress on your setup. Following these safety tips will help you travel with confidence and avoid surprises along the way.
1. Always Use Bow and Stern Lines on Highways
When driving at high speeds, the wind creates powerful lift under and around the kayak. Even if your roof straps are tight, the kayak can shift forward or backward without bow and stern tie-downs. These lines act like anchors, preventing forward slide during sudden stops and keeping the kayak from swaying in crosswinds.
2. Drive a Little Slower Than Usual
A kayak on your roof changes your car’s aerodynamics. It catches the wind like a sail, creating more drag and reducing fuel efficiency. It also raises your vehicle’s center of gravity, which can make sharp turns feel less stable. Driving 5–10 mph slower than usual, especially in windy or high-traffic areas, helps reduce strain on the straps and keeps the ride smoother.
3. Stop and Recheck Straps on Long Trips
Straps can loosen slightly as the car vibrates or the kayak shifts into place. A good habit is to stop after 15–20 minutes of driving to recheck everything. On very long trips, plan to pull over every couple of hours to make sure the kayak is still snug and the straps aren’t fraying. This small step adds a lot of security.
4. Be Aware of Height Clearance
With a kayak on the roof, your vehicle is much taller than usual. Bridges, tunnels, parking garages, and even fast-food drive-thru overhangs can suddenly become obstacles. Before pulling into a space, ask yourself if the kayak will clear the height. Many paddlers have learned this lesson the hard way, damaging both the kayak and their car roof.
5. Avoid Sudden Maneuvers
Quick lane changes, hard braking, or sharp turns put extra stress on the straps and rack system. While kayaks can handle highway speeds, they’re still a bulky load on top of your vehicle. Smooth, steady driving is safer and prevents the kayak from shifting.
6. Watch Out for Crosswinds
Highways often expose your vehicle to strong side winds, especially near open fields, bridges, or coastal areas. A kayak’s large surface area can act like a sail, pulling your car sideways slightly. Keep both hands on the wheel, maintain steady control, and slow down if winds feel too strong.
7. Consider Weather Conditions
Rain can make straps slippery, while extreme heat may cause nylon straps to stretch slightly. In cold weather, frozen straps can be harder to tighten. Being mindful of the weather and adjusting your strapping routine, like checking tension more often in wet conditions, keeps your load secure.
8. Use Strap Protectors for Long Trips
On long highway drives, straps can vibrate and hum in the wind. This isn’t just noisy; it can also weaken the strap over time. Using strap protectors, twisting the straps slightly, or tucking away loose ends can prevent the “strap buzz” effect and extend strap life.
9. Don’t Leave the Kayak Unattended Too Long
At rest stops or overnight stays, an unsecured kayak on your car can attract unwanted attention. Always lock your straps with cam-buckle locks if possible, or park in visible areas. If you’re leaving the kayak overnight, consider removing it and storing it somewhere safe.
10. Trust Your Gut While Driving
If something feels off, like extra noise, vibration, or wobbling, don’t ignore it. Pull over and check the straps. It’s always better to stop and fix a small issue than to risk a loose kayak on the highway.
By following these tips, you’ll not only protect your kayak and car but also make the drive less stressful. Highway travel with a kayak can be perfectly safe as long as you remain alert and take precautions.
How to Protect Your Car and Kayak During Transport
While strapping your kayak securely is the main priority, protecting both your kayak and your car from damage is just as important. Kayaks can be heavy, have sharp edges, and shift slightly during travel. Without proper care, you could end up with scratches on your car’s roof or dents in your kayak’s hull. Fortunately, there are several simple ways to keep both safe.
1. Use Padding Under the Kayak
Whether you’re placing the kayak directly on crossbars or using foam blocks, adding padding goes a long way in preventing scratches. Foam blocks, rubber pads, or specialized kayak rack pads help cushion the kayak and distribute its weight evenly. This reduces pressure points that can dent the roof or deform the kayak.
2. Protect Strap Contact Points
Straps that rub directly against your kayak’s hull or your car’s paint can leave marks after long trips. To prevent this, use strap protectors or pieces of cloth where the strap meets the kayak. For your car, small microfiber towels tucked under the straps near the doors or windows can prevent rubbing and scratching.
3. Avoid Metal-on-Metal Contact
The metal cam buckle on the straps can scratch your car or kayak if it swings loose. When tightening straps, always place the buckle carefully on the side of the kayak rather than on top. Some paddlers even cover buckles with soft sleeves or socks to avoid accidental dings.
4. Balance the Weight Properly
A kayak that isn’t centered on the roof rack can put uneven pressure on one side of your car. Over time, this imbalance may cause strain on the rack or roof rails. By keeping the kayak centered, you protect your vehicle’s structure and ensure a smoother ride.
5. Prevent Water Damage
If your kayak is wet after a paddle, dry it off before loading it onto your car. Trapped water can drip down into your vehicle’s roof rack mounts, potentially causing rust or mold over time. A quick towel dry also keeps straps from soaking and loosening during the drive.
6. Watch for Strap Buzz and Rubbing
On highways, straps can vibrate and create “strap buzz.” Beyond being noisy, this constant vibration can wear down straps and even scuff your car’s paint. To prevent this, twist each strap once before tightening; it stops the wind from making them hum.
7. Use a Kayak Cover (Optional)
For long trips or if your kayak is especially valuable, consider using a travel cover. Covers protect the kayak from UV rays, dirt, bugs, and small road debris. They also reduce wind resistance, helping you save fuel. Just make sure the cover is snug and doesn’t flap around.
8. Load and Unload Carefully
Many scratches happen not during the drive, but while loading or unloading the kayak. Always lift with care, and if you’re dragging the kayak onto the roof, use a towel or roller to protect the car’s paint. Having a second person to help makes this process much safer.
9. Avoid Leaving the Kayak on the Car for Days
It may be tempting to leave your kayak strapped to your car between outings, but prolonged exposure to sun and weather can damage both the kayak and your vehicle. UV rays can weaken plastic kayaks, and constant tension can wear out straps. If you’re not heading out again soon, it’s best to unload and store the kayak properly.
10. Check Rack Tightness Regularly
Roof racks themselves can loosen over time, especially with the extra pressure of a kayak load. Periodically check the bolts, clamps, or mounts on your roof rack system to ensure nothing is wiggling. This protects both your car’s roof and your kayak during transport.
By adding these protective measures to your strapping routine, you’ll extend the life of both your kayak and your vehicle. A little extra padding, careful strap placement, and mindful handling can save you from costly repairs down the road.
Alternative Options (Foam Blocks, Inflatable Racks, Trailer)
Not everyone has a permanent roof rack system, and sometimes the standard setup isn’t the best fit for your situation. Luckily, there are alternative methods to transport a kayak safely. These options range from budget-friendly solutions to more convenient setups that don’t require a traditional rack.
1. Foam Block Systems
Foam blocks are one of the simplest alternatives for transporting a kayak. They are thick, high-density foam pieces that sit directly on the roof of your car. The kayak rests on the blocks, and straps run over the kayak and through the car doors to hold everything in place.
Pros:
- Affordable and widely available
- Easy to install and remove
- Lightweight and portable
Cons:
- Less stable than crossbars
- Straps run through the car, which may let in rain
- Not ideal for highway speeds or long trips
Foam blocks are a good choice for short distances, occasional trips, or for paddlers who don’t want to install a full rack system.
2. Inflatable Roof Racks
Inflatable racks are a newer, portable option. They consist of durable inflatable tubes that strap onto your car’s roof. Once inflated, they create a cushioned base for the kayak. Straps go over the kayak and through the car doors just like with foam blocks.
Pros:
- Extremely portable, can be deflated and stored in the trunk
- Soft, cushioned surface protects both kayak and car roof
- Easy to install without tools
Cons:
- Less stable than permanent racks
- May shift slightly in strong winds
- Not designed for carrying multiple heavy kayaks
Inflatable racks are ideal for renters, people who don’t want to modify their car, or paddlers with limited storage space.
3. Soft Racks with Straps
Some companies offer soft rack systems made of padded fabric and straps. They function similarly to foam blocks or inflatable racks but use firm padding instead of foam or air. These racks can be rolled up when not in use and are secured by straps running through the car.
They offer more stability than foam blocks and don’t require inflation. However, like other temporary systems, they may let water in through the doors if it rains.
4. Trailers for Kayaks
For paddlers who transport multiple kayaks, large touring kayaks, or very heavy boats, a trailer is often the best option. Kayak trailers attach to your vehicle’s hitch and carry the boats at a lower height, making loading and unloading much easier.
- Pros:
- Safest way to transport multiple kayaks
- No lifting overhead, easier on the back
- Keeps the vehicle roof free for other gear
- Extremely stable on highways
- Safest way to transport multiple kayaks
- Cons:
- More expensive than other options
- Requires a hitch on your vehicle
- Takes up storage space when not in use
- More expensive than other options
Trailers are a great investment for families, groups, or serious paddlers who frequently travel with multiple kayaks.
5. Inside Larger Vehicles (Bonus Option)
For those with vans or trucks, another alternative is simply transporting the kayak inside the vehicle. Pickup trucks with long beds can often carry shorter kayaks, especially with a bed extender. Vans with enough interior space can also fit certain kayaks. While not always practical, this option eliminates roof racks and provides maximum security.
Each of these alternatives has its place. If you paddle often, a permanent roof rack with crossbars or cradles is still the best choice. But for occasional kayakers or those with budget or space limitations, foam blocks, inflatable racks, or a trailer can be excellent solutions.
FAQs About Strapping Kayaks
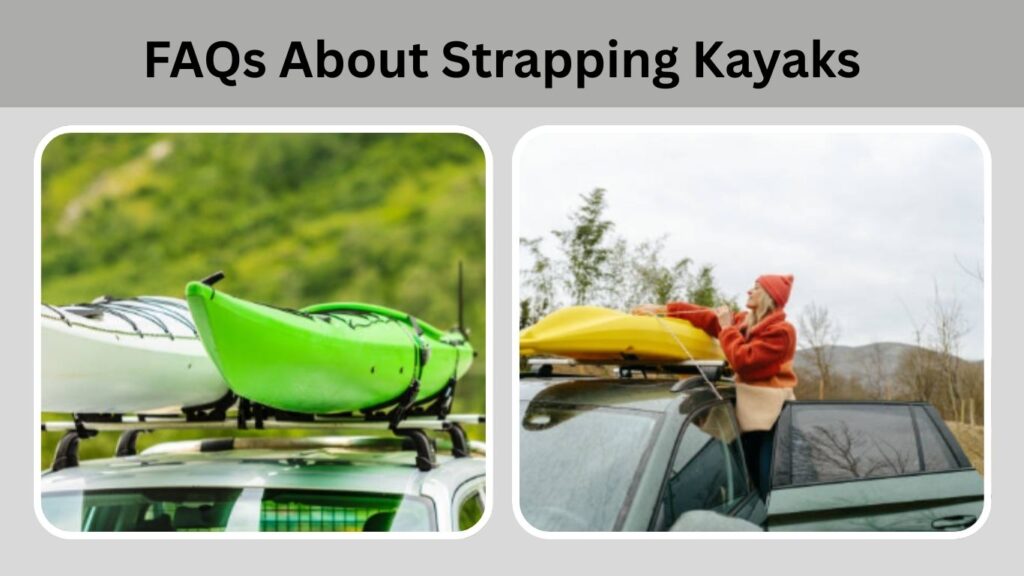
Even after learning the step-by-step process, many paddlers still have small questions or doubts when it comes to securing their kayak for travel. Below are answers to some of the most common concerns.
1. Do I need bow and stern lines if I already used cam straps?
Yes, bow and stern lines are strongly recommended, especially for highway driving. While cam straps secure the kayak to your roof rack, the bow and stern lines keep the kayak from shifting forward or backward during sudden stops, turns, or strong winds. They act like extra safety anchors.
2. Can I use bungee cords instead of straps?
No. Bungee cords are not safe for transporting kayaks. They stretch, lose tension, and can snap under pressure. Cam straps are the best option because they stay tight, are easy to adjust, and won’t loosen on the road.
3. What if I don’t have a roof rack?
You can still transport a kayak using foam blocks, inflatable racks, or soft rack systems. These options allow you to place the kayak directly on your car roof and strap it down securely. Just keep in mind that they aren’t as stable as a permanent rack and may not be ideal for long highway trips.
4. How fast can I drive with a kayak on the roof?
It’s best to stay under 65–70 mph when carrying a kayak on your roof. High speeds increase wind resistance and vibration, which can loosen straps or cause noise. Driving a bit slower also gives you more control in case of sudden movements.
5. Should the kayak face up or down?
It depends on your rack system:
- If you’re using J-cradles, the kayak usually rests on its side.
- With stackers, multiple kayaks are stacked on their sides.
- If you’re strapping directly to crossbars, it’s best to place the kayak hull-down (right side up) for stability.
Always follow the rack manufacturer’s recommendations.
6. Can I stack two kayaks on one roof rack?
Yes, but it requires the right equipment. Using a kayak stacker or J-cradles allows you to safely carry two or more kayaks. Without these, stacking directly on top of each other is not recommended; it’s unstable and may damage the kayaks.
7. Will the straps damage my car’s roof?
If installed correctly, straps should not damage your roof. However, if they are too tight or rub against the paint, they may cause scratches. To prevent this, place a towel or piece of padding under the straps where they touch the car.
8. What should I do if the straps make noise while driving?
Strap noise usually comes from loose ends flapping in the wind. Tie off the extra strap length and tuck it under the other straps or close it inside the car doors to reduce flapping. Some paddlers also twist the straps once before tightening to reduce vibration.
9. Do I need special straps for ocean or saltwater trips?
Not necessarily, but it’s a good idea to rinse your straps with fresh water after exposure to saltwater. Salt can wear down both nylon straps and metal buckles over time. Keeping them clean will extend their lifespan.
10. What if I hear creaking or shifting noises while driving?
Pull over safely and check the straps. Even a small shift can lead to larger problems if ignored. Always re-tighten the straps before continuing your trip.
These FAQs cover most of the concerns paddlers face when strapping kayaks. Keeping safety in mind and double-checking your setup before hitting the road will give you confidence every time.
Final Thoughts
Strapping a kayak to a roof rack may seem intimidating at first, but with the right equipment, proper technique, and a little practice, it becomes a simple and routine process. The key is to take your time, use quality straps, and double-check every tie-down before hitting the road. A well-secured kayak ensures safety for you, your passengers, and other drivers, while also protecting your kayak and vehicle from damage.
Understanding the type of roof rack you have, whether crossbars, J-cradles, or saddle racks, makes the strapping process much easier. Adding bow and stern lines, using padding, and protecting strap contact points all contribute to a safer and smoother journey. For those without permanent racks, foam blocks, inflatable racks, or trailers are excellent alternatives.
Common mistakes, like over-tightening, skipping tie-downs, or using old straps, are easy to avoid if you follow the step-by-step guidelines. Additionally, practicing safe driving habits, such as slowing down, checking straps on long trips, and being mindful of height clearance, ensures that your kayak stays secure throughout the journey.
Whether you’re transporting a single kayak or multiple boats, the principles remain the same: balance the load, secure it firmly, protect both kayak and car, and drive cautiously. Once you’ve mastered this process, loading and transporting a kayak becomes second nature, allowing you to focus on enjoying your paddling adventures.
With these guidelines, anyone, from beginners to experienced paddlers, can transport their kayak safely and confidently, making every trip to the water hassle-free and worry-free.