Transporting a kayak without a roof rack can seem challenging, especially if you’re new to kayaking or don’t have specialized equipment. However, it’s entirely possible with the right preparation, tools, and techniques. Whether using foam blocks, a trunk-mounted carrier, a DIY solution, or even a small trailer, there are safe and effective ways to get your kayak to the water. This guide will walk you through each method, along with essential safety tips and practical advice.
Why You Might Need to Transport a Kayak Without a Roof Rack
Transporting a kayak without a roof rack is a situation many paddlers face, and understanding why this need arises can help you choose the best method. One of the primary reasons is cost. Roof racks are a permanent investment, and high-quality models can be quite expensive. For someone who only goes kayaking occasionally, spending hundreds of dollars on a roof rack may not make sense. Temporary transport solutions offer a budget-friendly alternative without compromising safety.
Another reason is vehicle compatibility. Not all cars are designed to carry a roof rack. Smaller sedans, hatchbacks, and certain compact SUVs may lack the proper roof structure or mounting points to secure a traditional rack. In these cases, attempting to install a rack can be risky, potentially damaging your vehicle or the kayak during transport.
Occasional use is also a factor. Some paddlers only transport their kayak a few times a year or during certain seasons. Installing a roof rack for limited trips may feel unnecessary, especially if you lack storage space at home. Temporary methods, like foam blocks or trunk-mounted carriers, can provide the flexibility to transport your kayak safely when needed and store the equipment easily afterward.
Finally, using alternative transport methods can offer greater convenience and adaptability. You can adjust straps, padding, and positioning depending on your vehicle and kayak type. These methods also allow for quick setup, making spontaneous trips to local rivers, lakes, or the beach much easier. Understanding these reasons highlights the importance of knowing multiple ways to transport a kayak safely without relying solely on a roof rack.
Preparing Your Kayak and Vehicle

Proper preparation is the foundation of safely transporting a kayak without a roof rack. Taking the time to clean, inspect, and measure your kayak, as well as assessing your vehicle, can prevent accidents, scratches, and unnecessary stress during transport.
1. Clean Your Kayak
Before any trip, make sure your kayak is clean and dry. Dirt, sand, or small rocks can scratch the hull or damage paint when the kayak rubs against straps or your vehicle. Rinse off any mud or saltwater and dry the kayak thoroughly. A clean surface also ensures better friction when using foam blocks or padding, which keeps the kayak more stable during transport.
2. Inspect Your Kayak
Check for any cracks, weak points, or loose accessories like rudders, handles, or bungee cords. Small damages can worsen during transport, so securing or repairing them in advance is crucial. Removing detachable parts can also make the kayak lighter and easier to handle.
3. Check Your Vehicle
Not all vehicles are equally suitable for alternative transport methods. Measure the width and height of your roof, trunk, or hatch to ensure there’s enough space for the kayak. Look for secure points to attach straps, such as door frames, bumpers, or the edges of the trunk. Ensuring your vehicle can handle the kayak’s weight without damage is essential for safety.
4. Measure Your Kayak
Measure the length, width, and height of your kayak. Knowing these dimensions helps you plan for overhangs and ensure the kayak fits securely without obstructing traffic or violating local laws. Overhanging kayaks may require red flags or other visibility markers for safety, especially on busy roads.
5. Prepare Safety Gear and Equipment
Gather all necessary tools before loading the kayak. This includes strong straps or ropes, padding or foam, gloves for better grip, and a bright flag for visibility if the kayak extends beyond the car. Having everything ready reduces the stress of setup and ensures a smoother, safer process.
6. Plan Your Loading Process
Think about how you’ll lift and position the kayak. For larger kayaks, enlist the help of a friend to prevent injury and make placement easier. Decide which side will face up or down based on the method you choose, and identify the best spots to secure straps for maximum stability.
Proper preparation not only protects your kayak and vehicle but also makes the actual transport process faster, safer, and less stressful. Skipping these steps increases the risk of shifting loads, scratches, or accidents, especially when driving at higher speeds or on uneven roads.
Method 1: Using Foam Blocks on the Roof
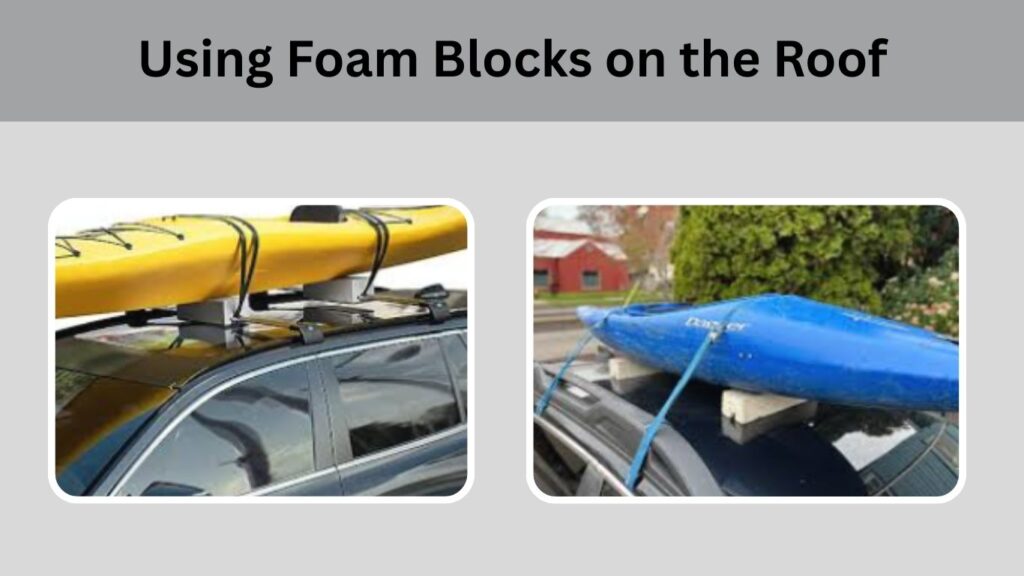
Transporting a kayak on the roof using foam blocks is one of the simplest and most budget-friendly methods when you don’t have a roof rack. Foam blocks act as a temporary support system, creating a cushion between your kayak and your vehicle while keeping it stable during transit. This method works for most car types, from sedans to SUVs, as long as you take the proper precautions.
1. Equipment Needed
To use this method safely, gather the following:
- Foam blocks or kayak saddles: These provide a soft, stable base for your kayak. Choose blocks thick enough to support the kayak without compressing too much under the weight.
- Strong straps or cam straps: These secure the kayak to your car. Avoid cheap ropes that may slip or break.
- Padding (optional): Blankets or additional foam can protect both the kayak and the vehicle’s roof from scratches.
2. Step-by-Step Instructions
- Place the foam blocks: Position two foam blocks on your car roof, spaced slightly wider than the width of the kayak. Ensure they are centered for balance.
- Position the kayak: Lift the kayak onto the roof, bottom side down, resting it on the foam blocks. Align it so that it sits evenly and does not tilt.
- Attach the straps: Loop straps over the kayak and under the car doors (never just around the roof). This secures the kayak against forward, backward, or sideways movement.
- Tighten carefully: Pull the straps snugly, but don’t overtighten to avoid denting the roof.
- Test stability: Gently shake the kayak to check if it moves. Adjust straps or reposition foam blocks as needed.
3. Tips and Tricks
- Use extra padding under heavier kayaks to prevent foam compression.
- Choose foam blocks with flat surfaces for better contact and stability.
- For longer trips, check the straps periodically to ensure they remain tight.
- If the kayak is long, consider using bow and stern tie-downs to prevent forward or backward movement.
4. Pros and Cons
Pros
- Inexpensive and simple to set up
- Works with most car types
- Doesn’t require permanent installation
Cons
- Less secure than a permanent roof rack
- Requires careful strapping and periodic checking
- Foam can compress under heavy kayaks, reducing stability
Transporting a kayak with foam blocks is ideal for short to moderate trips, especially if you occasionally paddle and want a temporary, flexible solution. When combined with proper tie-downs and cautious driving, this method can safely get your kayak to your favorite water destinations.
Method 2: Trunk- or Hatch-Mounted Transport
For those with sedans, hatchbacks, or smaller vehicles, trunk- or hatch-mounted kayak transport is a practical and effective alternative to roof racks. This method allows the kayak to rest partially on the roof while being supported by the trunk or hatch, making it safer for vehicles with lower clearance or smaller roofs. With the right straps and setup, this method can securely transport your kayak over short to moderate distances.
1. Equipment Needed
- Trunk-mounted kayak carrier strap kit: These kits usually include adjustable straps designed to hook over the trunk or hatch edges without causing damage.
- Bow and stern tie-downs: Essential for preventing the kayak from sliding forward or backward during travel.
- Foam padding (optional): Helps protect both the kayak and the car’s roof from scratches or dents.
2. Step-by-Step Instructions
- Open the trunk or hatch: Place the carrier straps over the top edges of the trunk or hatch. Ensure they are centered and securely positioned.
- Position the kayak: Lift the kayak onto the roof so that part of it rests on the foam padding and the other part extends over the trunk or hatch. Align it evenly to avoid tilting.
- Secure bow and stern tie-downs: Attach the straps to the front and rear of the vehicle, ideally connecting to solid points like bumpers or tow hooks. Tighten them to prevent forward or backward movement.
- Close the trunk or hatch carefully: Ensure the straps are not pinched and the trunk can close securely without causing damage.
- Test stability: Push and shake the kayak slightly to ensure it remains secure. Adjust straps if necessary before driving.
3. Tips and Tricks
- Use a bright red or orange flag on the kayak’s overhanging end to increase visibility for other drivers.
- Ideal for shorter trips or moderate driving speeds; avoid highways if possible with extended overhangs.
- Ensure the kayak is balanced side-to-side to prevent leaning or sliding.
- Regularly check the straps during long trips to maintain tightness and security.
4. Pros and Cons
Pros
- Does not require roof clearance
- Generally, more stable than foam blocks alone
- Quick setup for short trips
Cons
- Kayak may extend beyond the vehicle, requiring safety flags
- Not ideal for long trips or high-speed travel
- Limited to vehicles with trunks or hatches that can accommodate partial kayak support
Trunk- or hatch-mounted transport offers a safe and convenient method for paddlers without roof racks, especially for smaller vehicles or occasional trips. By combining proper tie-downs, padding, and careful driving, you can transport your kayak securely while avoiding the cost and installation of a permanent roof rack.
Method 3: Using a Trailer
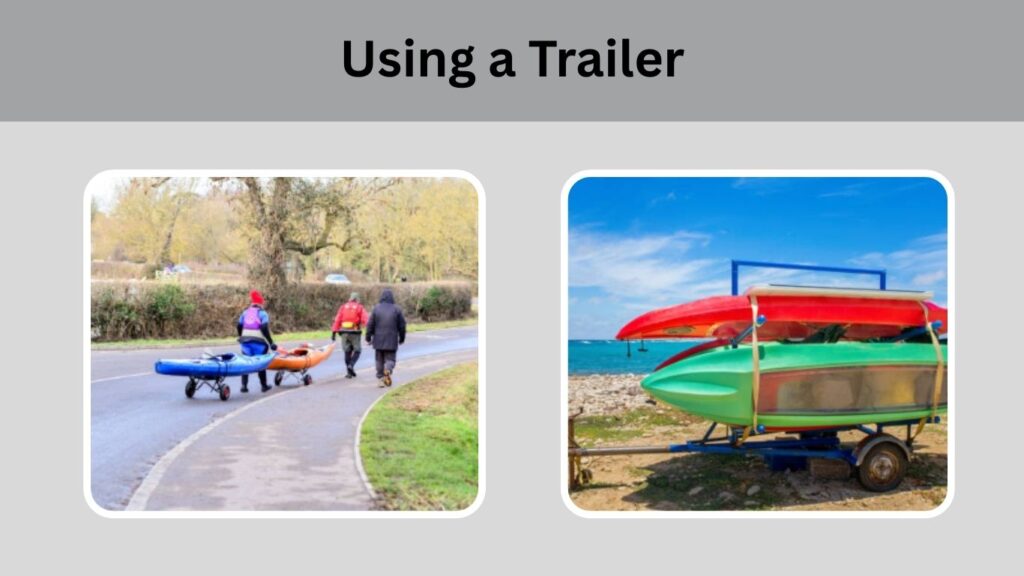
For kayakers who transport their boats frequently or have multiple kayaks, using a small trailer is one of the safest and most stable options. A trailer removes the need to place the kayak on the roof or trunk, protecting both your vehicle and kayak from potential damage. While it requires a bit more investment and planning, a trailer allows for easier loading, greater stability during transit, and the ability to carry multiple kayaks at once.
1. Equipment Needed
- Kayak trailer: Choose one suitable for the weight and length of your kayak. Some trailers are designed specifically for single kayaks, while others can hold multiple boats.
- Hitch receiver: Ensure your vehicle has a compatible hitch rated for the trailer’s weight.
- Tie-down straps or ropes: Secure the kayak firmly to the trailer to prevent movement during travel.
- Optional padding: Soft foam or blankets can protect the kayak’s hull during loading.
2. Step-by-Step Instructions
- Attach the trailer: Secure the trailer to your vehicle’s hitch and check that the hitch is locked and safe. Ensure all trailer lights are functioning.
- Load the kayak: Use ramps or enlist help to lift the kayak onto the trailer. Place it evenly, with the hull facing down, ensuring balance along the trailer bed.
- Secure the kayak: Loop tie-down straps over the kayak, attaching them to sturdy points on the trailer. Tighten the straps so the kayak cannot move in any direction.
- Check all connections: Inspect the hitch, straps, and trailer lights before driving. Make sure nothing is loose or hanging.
- Drive carefully: Trailers increase your vehicle’s length and affect turning and braking. Drive slowly, especially around corners, and avoid sudden stops.
3. Tips and Tricks
- Use wheel chocks if loading or unloading on an incline.
- For longer trips, check the straps periodically to ensure they remain tight.
- Trailers are ideal for transporting multiple kayaks at once, saving time and effort.
- Consider using a trailer with adjustable bunks or supports to accommodate different kayak shapes.
4. Pros and Cons
Pros
- Extremely stable and secure
- Can carry multiple kayaks
- Protects both the vehicle and the kayak from scratches or dents
- Ideal for heavy or long kayaks
Cons
- Requires a hitch and space for trailer storage
- More expensive than other transport methods
- Slower travel and more careful driving are needed
- It may be cumbersome in tight or crowded areas
Using a trailer is especially useful for avid paddlers who regularly transport their kayaks over longer distances or need to move more than one boat at a time. While it involves a higher initial cost, it offers unmatched stability and convenience, making it a worthwhile investment for frequent kayaking trips.
Method 4: DIY Kayak Carrier
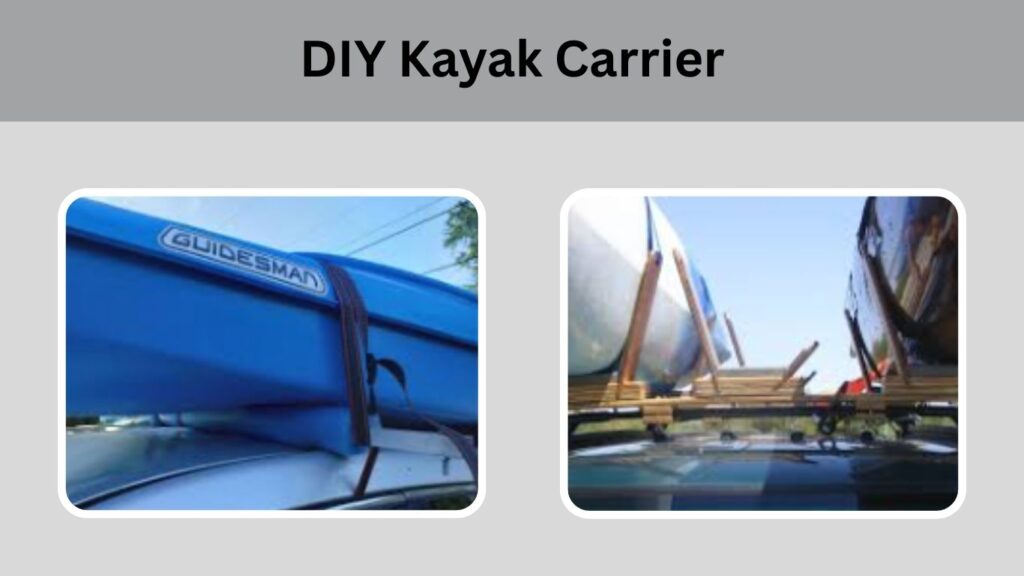
For paddlers who enjoy a hands-on approach or want a custom solution, building a DIY kayak carrier can be a practical option. This method allows you to tailor the carrier to your vehicle and kayak size, creating a secure transport system without investing in an expensive roof rack. While it requires some basic tools and construction skills, a well-built DIY carrier can safely hold your kayak and even accommodate multiple boats.
1. Materials Needed
- PVC pipes, wood, or metal framing: These materials form the structure of your carrier. Choose strong, durable options that can handle the kayak’s weight.
- Padding: Foam, blankets, or pool noodles protect the kayak and vehicle from scratches.
- Straps or ropes: To secure the kayak firmly to the carrier.
- Tools: Drill, screws, saw, measuring tape, and any hardware required for assembly.
2. Step-by-Step Instructions
- Design the frame: Measure your vehicle’s roof and your kayak to create a carrier that fits securely. Consider the width, height, and balance points.
- Build the frame: Assemble the carrier using your chosen materials. Ensure it is rigid, stable, and level. Attach padding to areas where the kayak will rest.
- Attach the frame to the vehicle: Secure the carrier using straps, bolts, or other safe attachment methods. Make sure it doesn’t shift during transport.
- Position the kayak: Place the kayak on the padded frame with the hull down. Ensure it is centered and balanced.
- Secure the kayak: Loop the straps over the kayak and tighten them to the carrier. For longer kayaks, add bow and stern tie-downs to prevent forward or backward movement.
- Test stability: Shake the kayak gently to ensure it is fully secure. Adjust straps or reposition padding if needed.
3. Safety Considerations
- Ensure the carrier distributes weight evenly to prevent tipping or damage.
- Double-check all attachment points before driving.
- Avoid overtightening straps, which can dent the vehicle or damage the kayak.
- Only use DIY carriers if confident in their structural integrity.
4. Pros and Cons
Pros
- Customizable to fit any vehicle or kayak size
- Can be reused for multiple trips or different boats
- Budget-friendly compared to permanent roof racks
Cons
- Requires basic carpentry or DIY skills
- Improper construction can be dangerous
- May not look as sleek or professional as commercial racks
A DIY kayak carrier is perfect for paddlers who like personalized solutions and occasional transport. With careful planning, strong materials, and proper safety precautions, a homemade carrier can be just as secure as commercial options, allowing you to move your kayak safely and efficiently.
Safety Tips for Transporting Without a Roof Rack
Safety is the most important consideration when transporting a kayak without a roof rack. Without the stability provided by a permanent rack, extra precautions are necessary to prevent accidents, damage, or injuries. Following these tips ensures your kayak remains secure and your vehicle and fellow drivers stay safe.
1. Use Bow and Stern Tie-Downs
Always secure both the front (bow) and rear (stern) of the kayak to your vehicle. This prevents forward or backward movement, especially during sudden stops or acceleration. Tie-downs can attach to bumpers, tow hooks, or other sturdy points, keeping the kayak firmly in place throughout the journey.
2. Check Straps Regularly
Before driving, inspect all straps for signs of wear, fraying, or damage. During longer trips, stop occasionally to retighten and check for any loosening. Using high-quality, durable straps reduces the risk of snapping or slipping while on the road.
3. Drive Slowly and Carefully
Without a roof rack, your kayak may be less stable, so avoid high speeds, sharp turns, or sudden braking. Driving slower allows the kayak to remain secure and reduces wind resistance that could shift its position. On highways or windy roads, extra caution is necessary.
4. Use Flags for Overhangs
If your kayak extends beyond your vehicle’s front or rear, attach a bright red or orange flag to alert other drivers. Overhanging kayaks can be difficult for other vehicles to see, especially in low-light conditions. Flags improve visibility and help prevent accidents.
5. Avoid Busy Roads or Bad Weather
Choose less congested routes to reduce stress and risk. Rain, snow, or high winds can make transport more dangerous. Whenever possible, transport your kayak during calm weather and on quieter roads for added safety.
6. Protect Your Vehicle
Use foam blocks, padding, or blankets between the kayak and your car to prevent scratches, dents, or paint damage. This is especially important if straps are used over the roof or trunk edges. Proper cushioning absorbs pressure and reduces friction during movement.
7. Keep Doors and Windows Secure
When using door-mounted straps, ensure all doors and windows can close securely. Pinched straps can damage the car or reduce security. Double-check that doors, hatches, and the trunk are fully closed before driving.
8. Plan for Stops
Long trips may require rest stops to check the kayak and straps. Make sure you have a clear, safe place to pull over. Adjust straps, reposition padding, or make minor corrections as needed.
Considerations for Kayak Weight and Size
The weight and size of your kayak play a crucial role in determining the safest and most effective transport method. Ignoring these factors can lead to instability, damage to your vehicle, or even accidents on the road. Understanding how weight and dimensions affect your transport options helps you choose the right method and prepare properly for the journey.
1. Lightweight vs. Heavy Kayaks
- Lightweight kayaks (under 40 pounds) are easier to lift, position, and secure. Foam blocks, trunk carriers, and DIY racks work well for these types. They also reduce strain when fastening straps and handling the kayak alone.
- Heavy kayaks require stronger support and more secure tie-downs. Foam blocks may compress under the weight, reducing stability. Bow and stern tie-downs become essential, and for very heavy kayaks, a trailer may be the safest option.
2. Short vs. Long Kayaks
- Short kayaks (under 12 feet) are easier to balance on the roof or trunk and require fewer adjustments. They are generally more stable during transport and easier to handle when loading or unloading.
- Long kayaks (over 12 feet) are more challenging to manage. They tend to extend beyond the vehicle, increasing the risk of overhang-related accidents. For long kayaks, bow and stern tie-downs, visible flags, and careful planning of routes are critical.
3. Width Considerations
Wide kayaks can make roof or trunk mounting tricky. Ensure that the kayak does not overhang excessively to the sides, as this can interfere with traffic or door clearance. Wide kayaks may also require wider foam blocks or custom padding to distribute weight evenly and prevent tipping.
4. Impact on Transport Method Choice
- Foam blocks: Best for lightweight and medium-sized kayaks. Heavy or very long kayaks may compress the foam or become unstable.
- Trunk-mounted carriers: Suitable for shorter or medium kayaks but can be risky for long, heavy boats due to overhang.
- Trailers: Ideal for heavy, long, or multiple kayaks, offering maximum stability and protection.
- DIY carriers: Can be tailored for size and weight, but must be designed to handle the kayak’s specific load safely.
5. Tips for Managing Weight and Size
- Always lift with care; use two people for heavy or long kayaks.
- Use extra padding to prevent roof or trunk damage.
- Distribute the weight evenly along the vehicle to maintain balance.
- Consider the route, avoid low-clearance bridges or tight turns for long kayaks.
By carefully considering your kayak’s weight and size, you can choose the transport method that ensures stability, protects your vehicle, and keeps your kayak safe during transit. Proper planning also reduces the risk of accidents and makes loading and unloading much easier.
Protecting Your Vehicle
Transporting a kayak without a roof rack can put your vehicle at risk of scratches, dents, or paint damage if proper precautions aren’t taken. Protecting your car not only preserves its appearance but also prevents long-term damage that could be costly to repair. By using simple padding techniques and careful strapping, you can safely transport your kayak while keeping your vehicle in top condition.
1. Use Padding Between Kayak and Vehicle
- Foam or pool noodles: Placing foam blocks or pool noodles between the kayak and the roof creates a cushion that absorbs pressure and prevents scratches.
- Blankets or towels: For DIY solutions or trunk-mounted methods, fold blankets over the roof edges or trunk to act as a protective layer.
- Carpet remnants or mats: These can be secured with tape or straps for added protection, especially under heavy kayaks.
2. Protect Doors and Trunk Edges
- When using door-mounted straps, ensure that padding is placed under the straps to prevent pinching or scratching the paint.
- Avoid tightening straps directly against the metal surface of your doors or trunk without a protective layer.
3. Avoid Straps Sliding or Rubbing
- Make sure straps are snug but not over-tightened, as too much tension can dent the car or damage trim.
- Using non-slip strap pads or covers helps prevent straps from moving and scratching the surface during transport.
4. Check Mirrors and Antennas
- Ensure that the kayak overhang doesn’t interfere with side mirrors, antennas, or roof-mounted sensors. Padding around these areas can prevent accidental contact and scratches.
5. Inspect Vehicle After Each Trip
- After unloading your kayak, check for any scratches, dents, or paint damage.
- Clean off dirt or residue left by padding materials or straps, which can cause long-term damage if left untreated.
6. Additional Tips
- Avoid placing heavy kayaks directly on a hot car roof, as heat can make some materials softer and more prone to dents.
- Use wider padding for heavier kayaks to distribute weight evenly and reduce pressure points.
- Regularly maintain padding and straps; worn-out materials can fail to protect your vehicle effectively.
Properly protecting your vehicle ensures that transporting your kayak is safe for both your car and your gear. With adequate padding, careful strapping, and attention to detail, you can prevent scratches, dents, and other damage, making each trip worry-free.
Legal Considerations
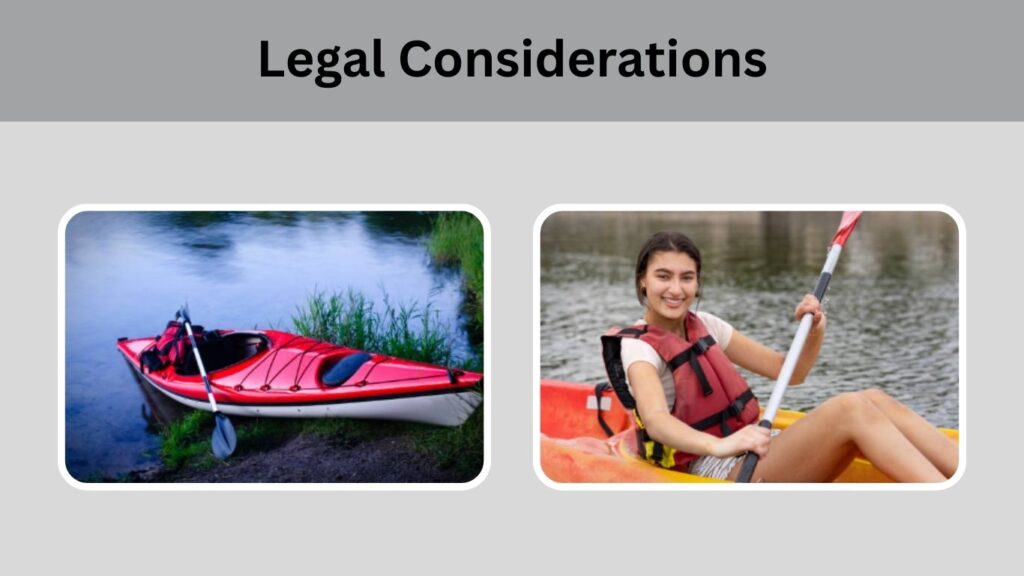
Transporting a kayak without a roof rack isn’t just about safety and convenience—it’s also important to comply with local laws and regulations. Failing to follow rules regarding overhang, visibility, and load security can lead to fines or accidents. Understanding the legal requirements ensures your transport is both safe and lawful.
1. Overhang Limits
- Many regions have specific limits on how far a load can extend beyond the front or rear of a vehicle.
- Typically, the rear overhang may be allowed up to 4–5 feet, while the front overhang is usually more restricted.
- Always measure the kayak and ensure it does not exceed legal limits. Overhanging kayaks may require additional tie-downs or safety flags.
2. Visibility Requirements
- If your kayak extends beyond the vehicle, most laws require a bright red or orange flag at the end to alert other drivers.
- For night transport, consider reflective tape or lights to increase visibility. This prevents accidents caused by drivers not seeing the overhanging kayak.
3. Speed Restrictions
- Some areas impose speed limits for vehicles carrying overhanging loads.
- Driving too fast can create instability, increasing the risk of the kayak shifting or detaching. Always adhere to posted speed limits and adjust speed according to load security.
4. Securing the Load
- Laws generally require that all loads be properly secured to prevent movement during transport.
- Using bow and stern tie-downs, properly tightened straps, and padding is not only recommended for safety but often a legal requirement.
5. Local Rules and Regulations
- Regulations can vary significantly depending on your state, country, or municipality.
- Always check local transportation or motor vehicle department guidelines before transporting your kayak. Some areas may require specific permits or have additional restrictions for oversized loads.
6. Consequences of Non-Compliance
- Fines or traffic tickets
- Increased liability in case of accidents
- Potential damage to your kayak or vehicle due to insufficient securing
By understanding and following legal considerations, you ensure that your kayak transport is safe, compliant, and stress-free. Proper planning and adherence to regulations prevent accidents and protect both your kayak and other road users.
Conclusion
Transporting a kayak without a roof rack is entirely possible with proper planning, the right tools, and safety precautions. Methods like foam blocks, trunk- or hatch-mounted carriers, small trailers, or DIY solutions suit different kayak sizes and vehicle types. Preparing your kayak, securing it with straps and padding, and adding flags for overhang ensures stability and visibility. Considering weight, size, and legal requirements, like overhang limits and speed restrictions, prevents damage and keeps you compliant. With careful preparation, you can transport your kayak safely, smoothly, and stress-free.