Fishing is not just about throwing a line into the water and waiting for a fish. It’s a skill, and like any skill, you need the right tools and the right techniques. One of the most important things you should learn as an angler is how to tie strong fishing knots.
A good knot is what connects your fishing line to your hook. If the knot is weak, the line might slip or break, and you could lose the biggest fish you’ve ever hooked! That’s why knot tying is one of the first lessons every fisherman should master.
One of the best and strongest knots for fishing is the Snell Knot. This knot has been trusted by anglers for many years because it is strong and reliable. In this guide, you’ll learn what a snell knot is, why it’s so popular, and most importantly, how you can tie it step by step.
Whether you are completely new to fishing or you have been fishing for a while, this guide will make tying a snell knot simple and easy for you.
What is a Snell Knot?
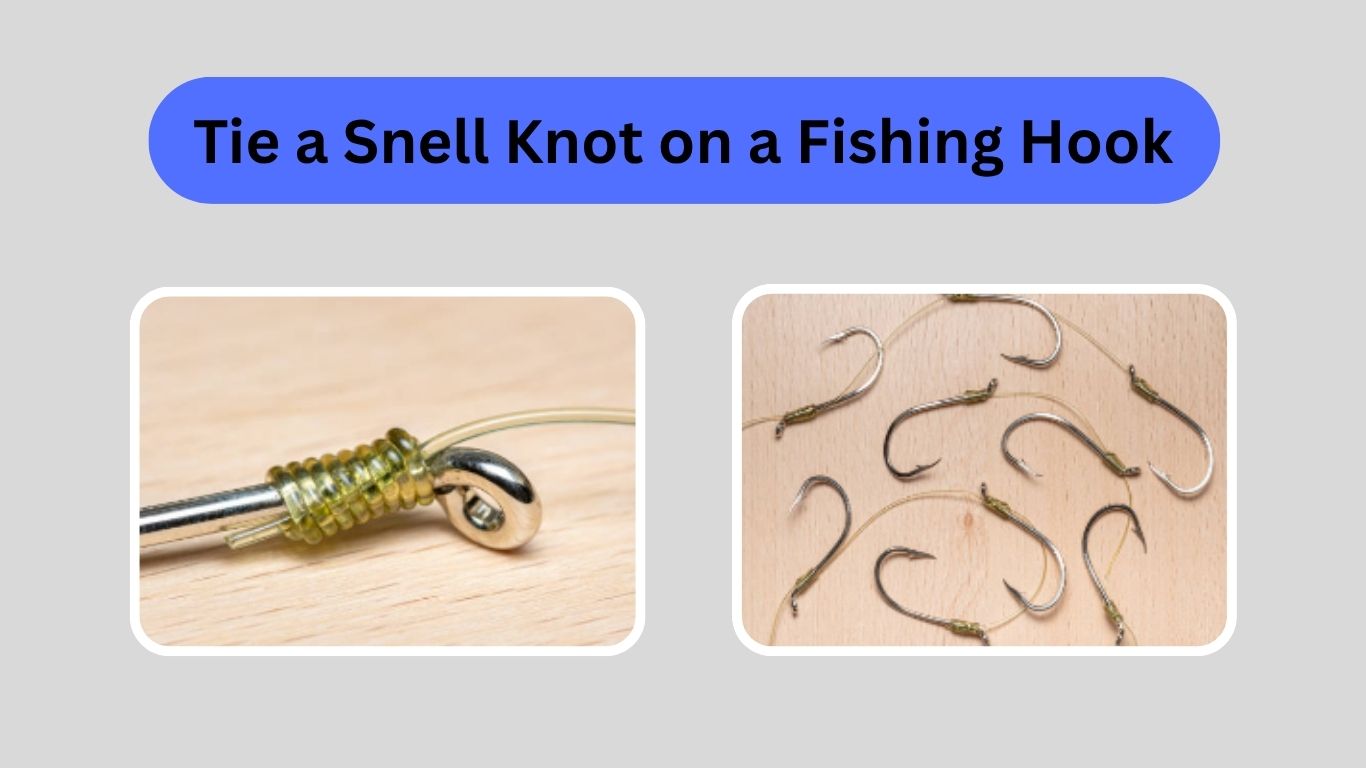
A snell knot is a special kind of fishing knot designed to attach a hook securely to your fishing line. Unlike most knots that only grip the eye of the hook, the snell knot does something different and much smarter; it wraps the line tightly around the shank (the long, straight part of the hook).
Why does this matter so much? This wrapping technique creates extra holding power and keeps the hook perfectly in line with your fishing line. This straight alignment is important because it makes your bait sit naturally in the water, just like real prey, which helps you trick the fish and get a solid hook set every time.
In simple terms:
- A snell knot locks the hook firmly to the line, so it won’t slip or move.
- It keeps the hook perfectly straight and balanced, which is ideal for catching fish.
- It’s one of the oldest, strongest, and most reliable fishing knots ever used by anglers.
When Should You Use a Snell Knot?
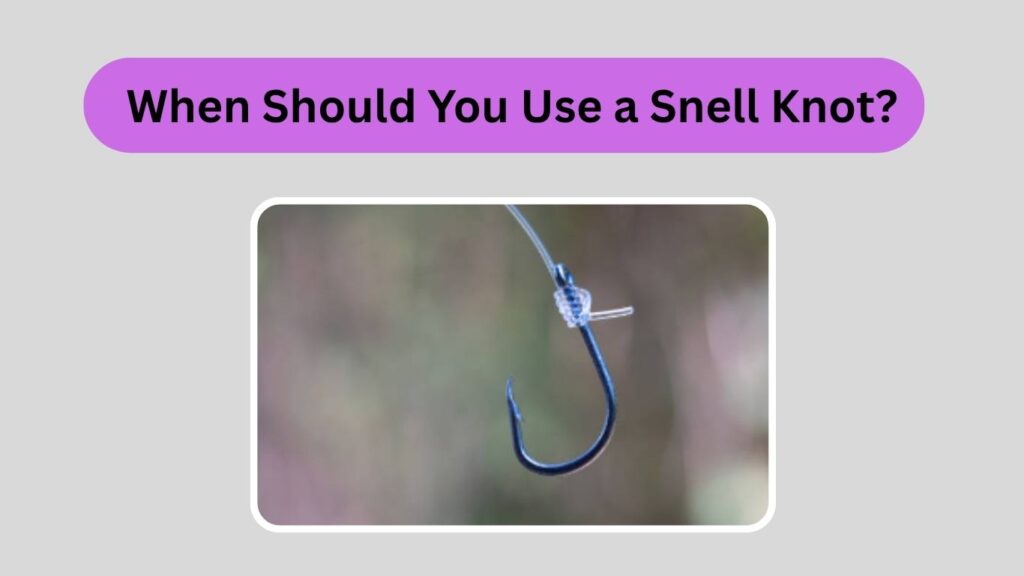
The snell knot isn’t something you’ll use in every fishing situation, but there are times when it works better than almost any other knot. Here’s when you should choose a snell knot:
- When using circle hooks – If you’re fishing for catfish, bass, or saltwater fish, circle hooks are very popular because they hook fish safely in the corner of the mouth. A snell knot is the best knot for these hooks because it keeps them in the perfect position for a strong hook set.
- When you need extra strength – Some fish fight hard and can easily break a weak knot. The snell knot grips the hook tightly and gives you a super-strong connection that won’t slip, even under heavy pressure.
- When fishing with a leader line – Many anglers use a leader for big fish or in tough conditions. The snell knot works perfectly with leader lines, keeping everything secure.
- When you want your bait to look natural – Fish are smart. If your bait looks strange or sits at an odd angle, they might ignore it. The snell knot keeps your hook straight and your bait in a natural position, making it look more like real food to the fish.
What You Need Before You Start
Before you begin tying a snell knot, it’s important to have the right tools ready. Having everything prepared will make the process easier and quicker. Here’s what you’ll need:
- A fishing hook – You can use any size hook for a snell knot, but it is most commonly used with circle hooks because they work perfectly with this knot. Circle hooks are great for strong hook sets and are often used for catch-and-release fishing.
- Fishing line or leader – This knot works with almost any type of fishing line, including monofilament, fluorocarbon, or even braided line. If you’re going after big fish, a leader line (which is usually stronger and more durable) is a good choice for extra protection.
- A pair of scissors or line clippers – After you finish tying the knot, you’ll have some extra line sticking out. You’ll need sharp scissors or fishing clippers to trim off the excess so the knot looks neat and doesn’t get in the way while fishing.
Step-by-Step Guide: How to Tie a Snell Knot
Tying a snell knot might look tricky at first, but once you understand the steps, it becomes very easy. Take your time and practice these steps slowly until you feel confident. Here is the simplest way to do it, explained in detail:
Step 1: Pass the Line Through the Hook Eye
Start by holding your fishing hook in one hand and your fishing line in the other. Take the end of your fishing line and pass it through the eye of the hook from the front side (the side facing the hook point). This is very important because passing the line from the wrong side can make the knot less effective.
Pull about 6 to 8 inches of line through the eye. This extra length will give you enough line to work with when making the wraps. Don’t pull too much or too little; 6 to 8 inches is perfect for most hooks.
Step 2: Lay the Line Along the Hook Shank
Once the line is through the eye, take the extra piece you just pulled through and lay it along the straight part of the hook, which is called the shank. This part of the hook is between the eye and the bend.
By placing the extra line along the shank, you’re preparing the base for the wraps. Keep the line straight and close to the hook so it doesn’t move around while you wrap.
Step 3: Wrap the Line Around the Hook Shank
Now it’s time to make the wraps that give the snell knot its strength. Take the tag end (the loose end of the line) and start wrapping it around both the hook shank and the main line together.
Make 6 to 8 neat wraps, one after another. The wraps should be tight and close together so they form a nice, even coil. If your wraps are loose or spaced too far apart, the knot won’t hold as well. Take your time and keep them smooth.
Step 4: Pull the Tag End Through the Loop
After finishing the wraps, you’ll see a small loop near the hook eye where the line first passed through. Take the tag end (the same piece you used for wrapping) and gently pass it back through that loop.
This step locks everything in place. Make sure the line goes through the loop completely before tightening.
Step 5: Tighten the Knot
Now comes the most satisfying part, tightening the knot. Hold the wraps firmly with your fingers so they don’t loosen. Then slowly pull the main line (the line connected to your reel) while also pulling the tag end just a little to snug everything up.
You’ll see the wraps tighten and grip the shank of the hook securely. Make sure the wraps are tight, smooth, and in the right position. Once it feels solid, use scissors or fishing clippers to trim off the extra tag end.
An Easier Snell Knot for Beginners
If the previous steps seem a bit difficult, here’s a simpler way to tie a snell knot. First, pass the fishing line through the eye of the hook and create a large loop with the tag end. Hold this loop firmly along the straight part of the hook, known as the shank. Next, wrap the loop tightly around the hook shank about six to eight times, keeping the wraps neat and close together.
After making the wraps, pull both ends of the line, the main line and the tag end, to tighten the knot securely around the shank. Finally, trim any excess line to finish the knot. This easier method is great for beginners learning to tie a strong, reliable snell knot.
Common Mistakes to Avoid
- Not making enough wraps – If you wrap the line around the hook shank fewer than six times, the knot may not hold properly and can become weak. The strength of the snell knot comes from those tight, multiple wraps, so be sure to make at least six to eight wraps for a secure hold.
- Wrapping too loosely – If your wraps are loose, uneven, or messy, the knot can slip or come undone when you pull on the line or when a fish bites. It’s important to keep each wrap tight and neatly placed right next to the previous one to ensure the knot stays strong.
- Passing the line the wrong way through the hook eye – Always make sure to pass your fishing line through the front side of the hook eye, the side facing the hook point. Passing the line through the back can weaken the knot’s hold and cause it to slip or fail when under pressure.
Tips for Beginners
- Start by practicing on a big hook first. It’s easier to watch what you’re doing and learn the steps.
- Before you tighten the knot, wet your fishing line with a little water or saliva. This helps reduce rubbing and makes the knot stronger and less likely to break.
- If you’re trying to catch big fish, use a leader line, a stronger piece of line attached to your main line. The snell knot works well with leader lines and gives you extra strength when fishing for bigger catches.
Snell Knot Compared to Other Popular Fishing Knots
When choosing a fishing knot, it’s important to know how the snell knot stacks up against other common knots like the Improved Clinch Knot and the Palomar Knot. Each knot has its own strengths and best uses, so understanding the differences can help you pick the right one for your fishing needs.
Snell Knot vs. Improved Clinch Knot:
The snell knot is known for being very strong and reliable. One of its main advantages is that it keeps the hook perfectly straight and aligned with the fishing line. This straight line helps improve bait presentation and increases your chances of hooking fish securely. On the other hand, the Improved Clinch Knot is faster and easier to tie, which makes it popular for many anglers, especially beginners. However, it’s generally not as strong as the snell knot and can sometimes slip or weaken under heavy pressure. So, if you want maximum strength and better hook alignment, the snell knot is the better choice.
Snell Knot vs. Palomar Knot:
The Palomar Knot is loved by many anglers because it is simple and quick to tie, and it offers excellent strength for general fishing needs. It works well with many types of hooks and lines, making it very versatile. However, when it comes to bait rigs and especially circle hooks, the snell knot outperforms the Palomar. The snell knot’s unique wrapping method keeps the hook in perfect line with the bait and the fishing line, which can lead to more effective hook sets and better fishing success. For situations where bait presentation and hook position matter a lot, the snell knot is often preferred over the Palomar.
In summary, while the Improved Clinch and Palomar knots are useful and popular, the Snell Knot offers superior strength and hook alignment, making it the ideal knot for serious anglers, especially when using bait rigs and circle hooks.
Why the Snell Knot is Ideal for Catch-and-Release Fishing
Using a snell knot together with a circle hook creates a powerful combination that benefits both the angler and the fish. When a fish bites, the snell knot helps the circle hook catch securely in the corner of the fish’s mouth, which is the safest place to hook a fish.
This precise hooking location minimizes injury to the fish, making it easier to remove the hook quickly and safely. Because of this, the fish has a much better chance of surviving after being released back into the water.
This is why many anglers who care deeply about preserving fish populations and practicing responsible fishing prefer the snell knot. It not only improves your chances of a strong hook set but also helps protect the fish so they can swim away healthy and unharmed.
Final Thoughts
The snell knot stands out as one of the strongest, most dependable knots you can learn in fishing. Whether you’re a beginner just starting or a seasoned angler looking for reliable performance, this knot offers incredible strength and keeps your hook perfectly aligned with the fishing line.
This alignment ensures your bait looks natural in the water, which helps attract more fish and improves your chances of a successful catch. Take some time to practice tying the Snell Knot at home before your fishing trips. With a little repetition, you’ll be able to tie it quickly and confidently, even under pressure on the water.
Once you master this knot, you’ll reduce the risk of losing fish because of weak or slipping knots, giving you a much better chance to bring in those big catches you’ve been dreaming about.